A year or so ago I made some plates using a ceramic pen, since then I learned you can do this same thing with a sharpie....uhhh....score. I happen to have quite the collection of sharpie markers, and it's certainly more affordable then buying ceramic pens in every color.
It's a super simple process. I'm making some kid friendly Thanksgiving plates. I found a pumpkin I liked, and I scribbled pencil all over the back of what I wanted to outline on the plate.
I center it, then traced over the lines on the front.
This transfers the pencil to the plate to give me an outline I can go over with permanent marker.
I colored it in with sharpies, and then you just bake at 300 for 30 minutes and it's set.
I'd hand was these, but they are user friendly at this point.
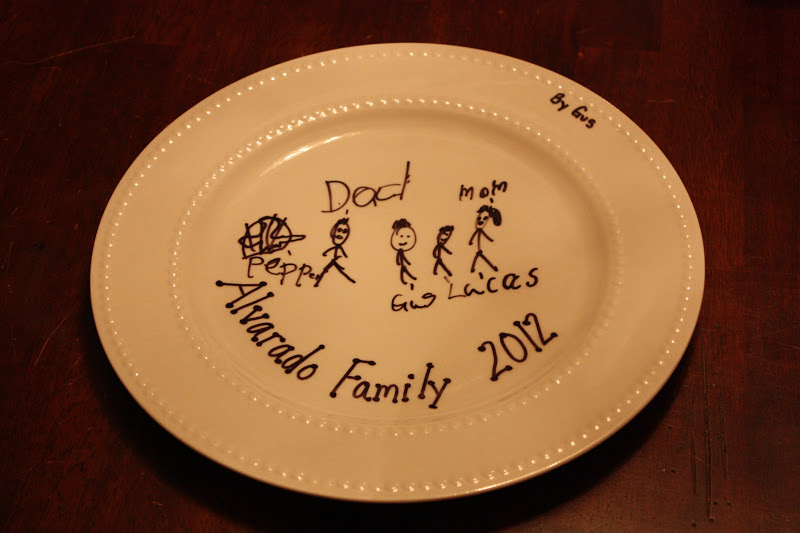
Another cute version, grab plates (from the dollar tree) and let the kiddos draw a picture of the family for serving platters, or individuals for table setting. My pal Gust drew these little jewel for me to show on GMT Thursday.
I also grabbed some mugs and found some fun fonts online and used the same process to make Anthropologie-ish type mugs.
Oh the possibilities.....


7 comments
These would make awesome Christmas gifts! Especially since you can use a sharpie!
I love your plates! Who knew a Sharpie would work? Genius!
Love the plate tutorial. It came just in time for my granddaughter's birthday! Thanks for sharing.
Are these food safe using the sharpies or are they for decorative use only, such as for chargers with a clear plate on top?
This is brilliant! Gonna have to try this, I can see my kids making some cool Christmas gifts using this method :)
What font is that? Thinking about doing the same thing just on a plate
I used comic sans, and boded it. :O) Hope that helps!
Post a Comment