Category: Cooking
Showing posts with label Cooking. Show all posts

Homemade Vanilla

Saturday, October 01, 2022 No comments


I'm about to head out on my annual girl's retreat in October.  We decided to do a 'favorite things' exchange (I do this in the summer with a group of crafting friends I've been retreating with for over a decade and we love it).  My favorite thing is probably something sweet.  I was planning on getting a favorite cupcake or cookie, but I brought cookies last year from an Austin bakery I love, so I decided to bring something sweet related-an ingredient.  

These would also make awesome gifts for Christmas.  It's not super 'cheap' to make, but it is fun.  I found a pack of 9 bottles on Amazon that even came with tags (I didn't use) and a funnel (I did).  I bought 8 oz bottles, but in doing that, they do use a lot of Vodka, which upped the price.  

I also bought some vanilla beans on Amazon.  I read the reviews really carefully to find some that were not already split (apparently some people split them and take out the 'good stuff' and then sell the rest of the bean, which impacts your vanilla).  This company also had good reviews when it came to returns (if the seal breaks while shipping, they can mold).  I split my whole beans down the middle, but left about an inch together at the end b/c you just want it to infuse your alcohol and not have too many pieces floating around.  You can strain your vanilla after a few months, but....I'll leave that to the girls that get these.    
I then did some alcohol research and I learned not to use a bottom shelf Vodka, and not to use one infused with flavors.  Tito's was one that was recommended, so I went with that.  1 liter fills 4-5 bottles, depending on how full you make them.  
I put two beans (split in two) in the bottles, poured vodka over it, and sealed the bottles.  I also made some little tags for the front and I'm going to add an instruction tag.  I read these can be used within 8 weeks, but are best after 8 months.  It also says you can continuously refill your vanilla bottles, using the same beans for years.  I guess I'll let you know this time next year!  

The vodka is already amber (a few hours later), and I'm planning to shake them up every few days until I gift them away.  I probably spent almost $10 a bottle, but the bigger bulk you buy, the cheaper your vanilla will be.  

Homemade Jam

Friday, May 04, 2018 1 comment

     I'm working through the 'easier' things on my 40 before 40 list right now.  Some things are simple, but I've never taken the time to try them out....like canning.  I've always wanted to can something, in particular, jam.  I didn't take this through the whole process of boiling this and sealing the jar b/c my plan was to A)  See if it was worth preserving.  B)  Eat it quickly. 
     Having made this recipe, I will definitely make more and boil it to seal the jar so I have jam past the strawberry season.  I don't think I've ever had homemade jam, but....now I'm not sure I can ever go back to the store.
     I found this recipe at allrecipe.  I used the one with the fewest ingredients (and no gelatin).  See that foam at the top?  You can skim it off if you want-it's just air bubbles.  But....you do you.  The below recipe makes about 3 jars of jam, but I halved the recipe to start with....because there is nothing worse than three jars of grossness, but....having made it.....I'm going to go cut up the rest of my strawberries....and there will be gifts in the future for some of my friends.
Strawberry Jam
Ingredients:  2 lbs of strawberries (4 cups total of crushed strawberries), 4 c. of sugar, 1/4 c. lemon juice.
Instructions:
1.  Hull and roughly chop up strawberries.  Crush with a pastry cutter until the larger chunks are crushed and it's mostly juice.
2.  Add strawberries, sugar, and lemon juice to a pan.  Stir on low until combined until the sugar is dissolved.
3.  Bring to a rolling boil.  Stir frequently.  Allow jam to get to 220 degrees (I used a candy thermometer).  This took a few minutes (10 min), and the process helped break down the strawberries even more.
4.  Use a funnel to pour into hot (sterile) jars.  Leave 1/4-1/2 inch at the top.  Wipe off liquid from the top before adding the seal.
5.  Place in fridge if you are eating right away, or prepare in a water bath if you are saving these for later.
*Mine is a little runny, but it taste sooooo good.  I read to test to see if it's ready to gel, place a plate in the freezer.  After 10 min of boiling, place a teaspoon of jam on the plate.  Return to the freezer for 1 minute.  Pull out and run your finger through the middle.  If it doesn't pull back together-it's ready.

My Thoughts on Blue Apron (this is not an ad!).

Wednesday, May 04, 2016 No comments
 First and foremost....I'm not getting ANYTHING for telling you about Blue Apron.  I just decided to try it, and if you are like me, you've heard about it and wondered what it was all about, so...I decided to blog about it.  I don't feel any obligations to anyone but myself and anyone who is reading this and has wondered.
 Blue Apron is something you can set up online.  They send organic and fresh ingredients in a refrigerated box each week and recipe cards for the ingredients for you to use to cook up dinners.  You can chose a family plan (that feeds 4 and I think it's about 70 dollars and includes all the ingredients for 2 meals) or a couples plan (that feeds two, but you get three different meal for 60).  There is a place on the website to check off things you don't eat (shell fish, pork, fish, beef etc).  Each week there are six different meal options and you can adjust them SOME if you don't like the meals they are planning to send (based on your profile).  You can also skip any week you won't be in town/or doesn't sounds like something you'd want to enjoy.  Here's the one issue I have-I really wish you could just select all your meals....if you choose one others aren't an option with 'that combo'.  So...I find most weeks I really don't see three meals I want to try.  I don't eat fish, lamb, and I try to avoid pork.  BUT if you don't have these issues, you won't have as much trouble.
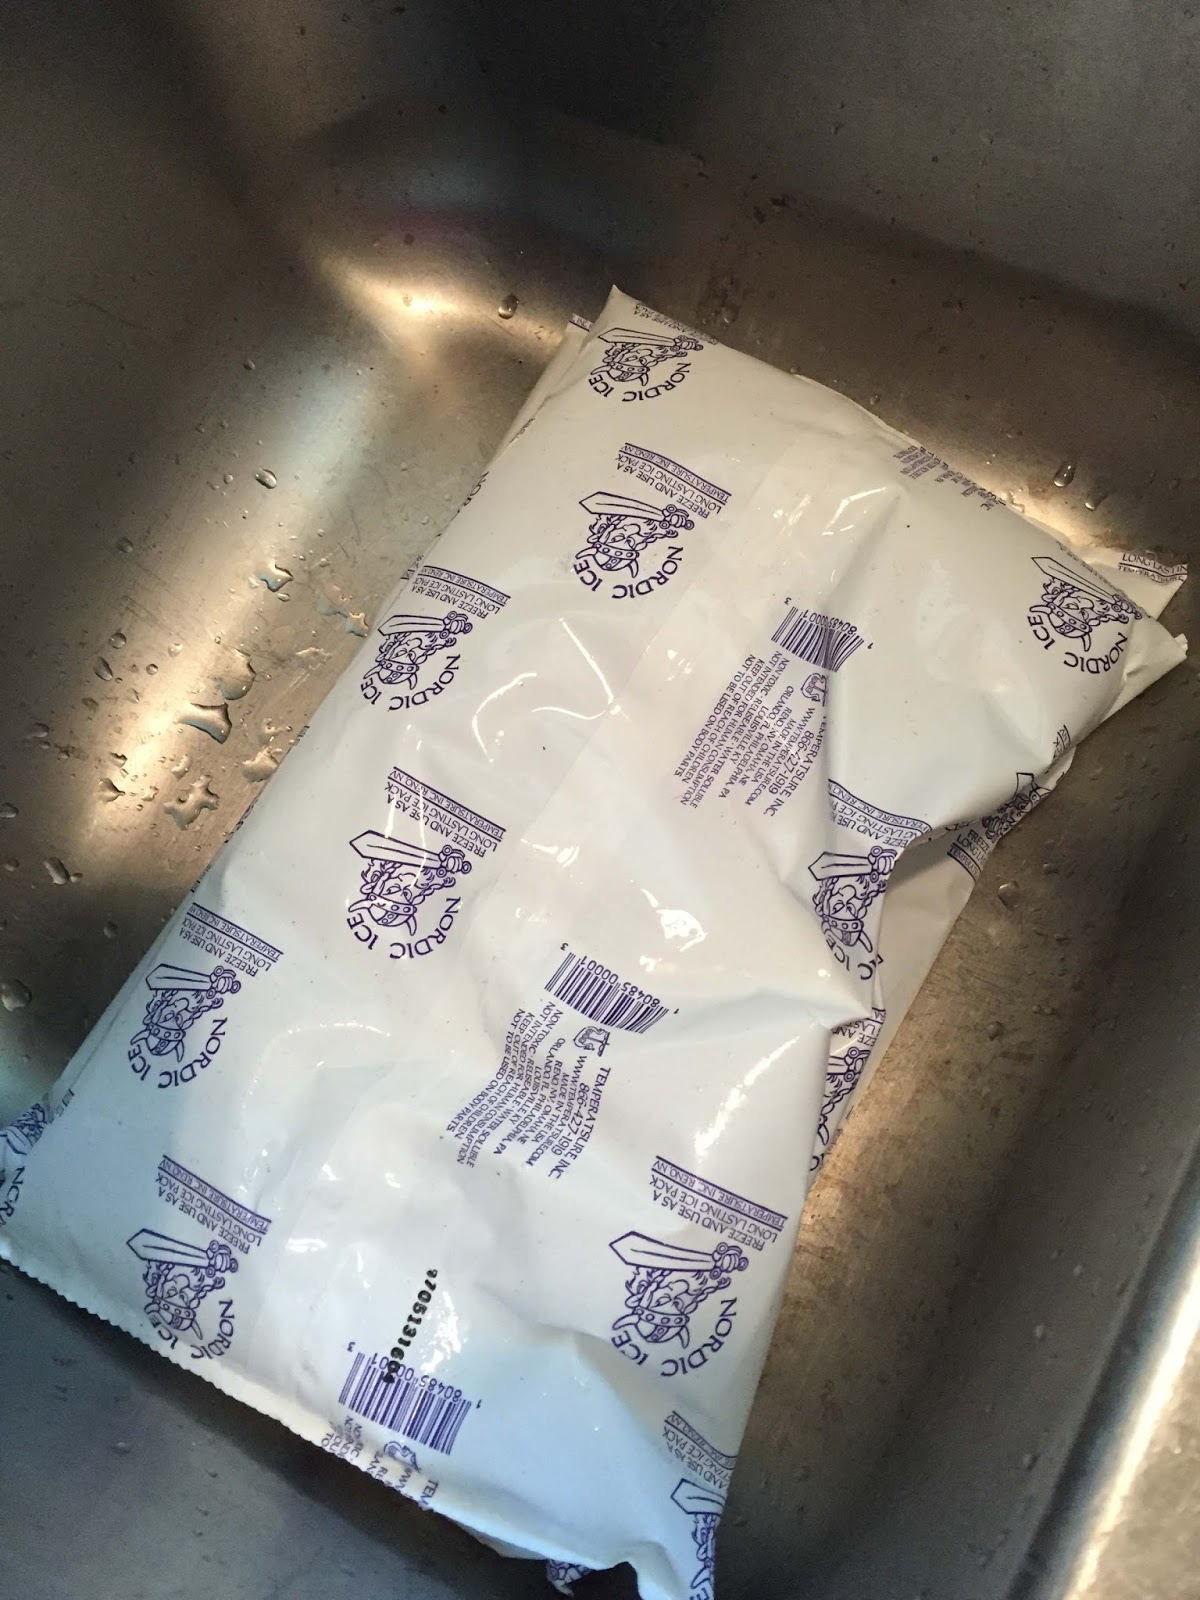
You choose from a few delivery days (I had mine delivered on Tuesday) and it arrives in an insulated box with three ice packs (see above).  
Each recipe card list all the ingredients needed for the meal and there are little brown bags with all the spices, butters etc for that meal.  The only thing they didn't provide you need a lot of is olive oil and salt and pepper.
The first meal I tried out was a steak meal.  I love it because there was even a little bit about where the ingredients were from/what country inspired the ensemble etc.  This one was from South Africa.
I have eaten a few plantains out and about, but I had never cooked one, and the trial spice in this go round was Grains of Paradise.  
 The card gives you step by steps on what to chop up and how.  The prep takes a bit of time, but I really enjoyed it because I was working with things I would not have chosen, and the instructions were clear enough I felt confident.
 The steak turned out really good.  I don't cook steak much AT ALL, especially via the stove.  I have also never cooked collard greens.  I think it had a little too much lime for my taste....I'm learning less is more when it comes to lemons and limes in cooking (though in baked goods, I'm a fan).
Meal two was chicken and purple potatoes, which I'd never cooked with before.  The one thing that impressed me was that the ingredients really were all 'the best' and in the end your vegetables took up half your plate, which I know is the recommended proportions these days.  I was even able to share a bowl of the potatoes, onions, and apple mix with my brother who is vegan because no dairy products were used in the set up of that part of the dish.  Side note: a lot of the options are vegetarian (not usually vegan).  
 Again, the apples in the mix threw me off a little, BUT if for no other reason, Blue Apron this go round was TOTALLY worth it for me because I learned how to cook chicken in a new way on the stove top and it was amazing...and it was nothing fancy.  I'll blog about that another time....it rocked my world.  The first two meals I tried were all totally made on the stove.  I needed a lot of prep bowls, a zester, and a skillet, but....not much else beyond that.
 Meal three was probably my favorite all around.  It was the only one that required baking.  I made a zucchini and spinach quiche.  The meal even came with two fresh mini pie crusts and two farm fresh eggs.  In this meal I got to work with a pink lemon and cream fresh....which I'd never worked with before.
The first week there is a coupon code to get 'one meal free'...basically 20 bucks off, so it was 40 dollars for three meals, which includes shipping.  I'll definitely try it again in the future.  I kind of felt like I was taking a cooking class.  I can't tell you that I'll make these particular recipes again, but I know more about food than I did last week.  I tried out things I've never tried (all ingredients are what's in season), and my chicken prep is forever changed.
One thing I'll say, if you are someone who likes home cooking, and wouldn't fall under the foodie category that loves experimenting and trying new foods-this is probably not for you.  BUT I felt like I was eating fairly healthy this week.  I enjoyed the prep and process.  I also got to skip the grocery store this week.  Winning.

Panda Express Chow Mein

Monday, July 14, 2014 No comments
One of my guilty pleasures is the chow mein at Panda Express.  I can't explain it-but I love it.  I saw the recipe for a copy cat of this dish via EatCakeForDinner and I was skeptical....
Guess what?  It was de-li-cious, and it taste exactly like P.E.....and it was super easy to make.  With the vegetables thrown it-I'm even pretending it's healthy.
This is one of my favorite recipe finds in awhile...so...if you are looking for something that fits the bill...
Chow Mein
Ingredients:  1/4 c. soy sauce, 1 T. brown sugar, 2 cloves garlic (minced), 1 t. ginger (grated-I just popped a little off a large cluster at the store-it was really cheap), black pepper (to taste), 2 T. vegetable oil, 2/3 c. celery (sliced), 1/2 medium onion (thinly sliced), 2 c. cabbage (shredded), 15 oz of chow mein noodles (they sell this fresh near the produce, but I found in near the asian foods, and just boiled it for 2 of the 3 minutes the package called for, drained it, and added it to the mix when it was called for to finish the cooking).
Instructions:  Combine the soy, b. sugar, garlic, ginger, and black pepper-set aside.  Boil the noodles as directed (I went a little under the required time so they wouldn't get too mushy).  Heat oil in a wok.  Add the celery, onion and saute until the onions are soft and translucent.  Add the cabbage and saute a couple more minutes until soft.  Add the noodles and soy mix.  Toss together.  Serve immediately.

Chicken and Wild Rice Casserole

Monday, July 07, 2014 No comments
I'm always looking for a filling recipe, and when I saw this on pinterest via RachelSchultz-I was intrigued.  I halved the original recipe, but it went a long way, and it lasted long beyond the last bite.  The cheese gives it a great flavor, and the rice stuck with me, which was a great combo!
So the next time you are hungry (and I'm speaking to future me... in third person, annoying), pull this out of the recipe vault....
Chicken and Wild Rice Casserole
Ingredients:  3 T olive oil, 1 white onion (diced), 3 stalks celery (diced), 3 carrots (diced), 2 T garlic (minced), 2 c chicken breast (cooked and shredded), 1 c. white rice, 16 oz wild rice, 3 T butter, 1/4 c. whole wheat flour, 1 c. vegetable broth, 4 c. cheddar cheese (shredded), garlic salt, salt and pepper.
Instructions:  Cook both rices according to packaged instructions.  Cook and shred the chicken.  Heat oil, onion, celery, garlic, and carrots in a pan over med heat for 10 minutes.  Stir in chicken, rices, and a dash of salt pepper, and garlic salt.  Reduce heat to low.  In a second pan over med/high, melt the butter.  Whisk in flour, vegetable broth (I used chicken), and salt and pepper to taste.  Continue to whisk until boiling.  Add 2 c. shredded cheddar cheese and stir until melted.  Place chicken and rice mix into a greased 9x13 pan.  Pour cheese sauce over rices and top with remaining cheddar.  Bake for 30 minutes at 350.

Cinco de Mayo: Pinata Brownies

Tuesday, April 29, 2014 No comments
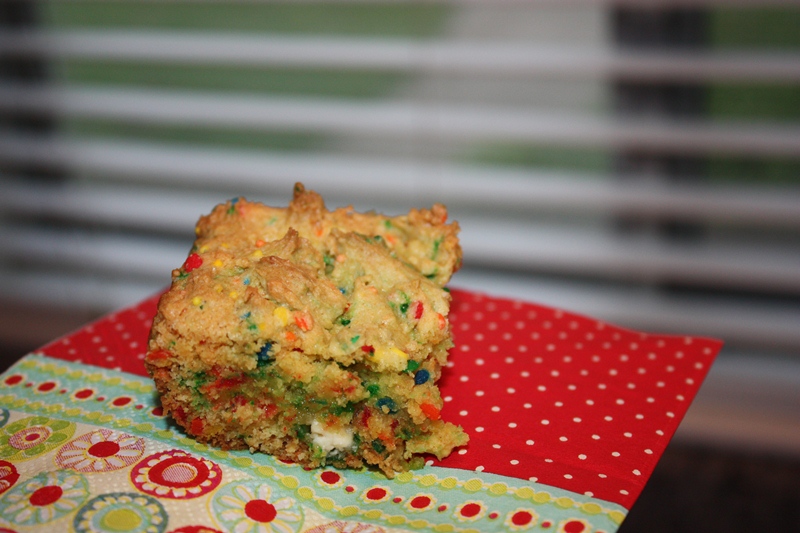
 A festive little brownie for Cinco de Mayo.  These are super easy to put together.  And tasty.  And colorful.  If you need one of those three things in your life---here a dessert recipe for the 5th.  ...or any day that ends in y.
Pinata Brownie Recipe
Ingredients:  1 box yellow cake mix, 1/4 c. vegetable oil, 1 egg, 1/2 c. milk, 1/4 c. multi colored sprinkles, 1/2 c. white chocolate chips
Instructions:  Combine the cake mix, oil and the eggs.  Add the milk.  Fold in the sprinkles and the white chocolate.  Spray an 9x9 pan.  Pour in the batter.  Bake for 25 minutes for 350 degrees.  Let them rest for about 30 minutes before cutting.

Carrot Cake Cookies

Wednesday, March 12, 2014 1 comment
 I saw the recipe for these cookies and I thought....hey, I like carrot cake.  And cookies.  And white chocolate.  And caramel.  Though I didn't know how I'd feel about four of my loves meeting for the first time in a little dessert.  Success!  These are de-licious...and the perfect thing to bring to an Easter themed meal....assuming you are into sharing cookies with other people.  I'm not.  I am into these cookies.These were originally posted at Inside Bru Crew Life...good call Bru Crew.   So...without further ado (just in case my friends who read this want to bribe me....this works...)
Carrot Cake Cookie Recipe
Ingredients:  1 boxed carrot cake mix, 1/2 c. butter (melted), 2 eggs, 1 t. vanilla, 1 t. cinnamon, 1 c. white chocolate chips, 1/2 c. kraft caramel bites
Instructions:  In a large bowl combine the cake mix, butter, eggs, vanilla and cinnamon.  Combine well and then fold in the chocolate chips and caramel.
Chill dough for 30+ minutes.  Roll into 1 inch balls and cook for 350 degrees.
 Remove from pan pretty quickly or the caramel with stick to the pan.  These make 2 dozen.

Family Recipe Card Tea Towel

Friday, September 13, 2013 3 comments
 As a love of all things 'old recipes,' when I saw the idea for scanning and enlarging family recipe cards at thekitchen I knew I had to add this to my list of things I must do.  Now. I adapted it a little.  The original instructions have you scan the recipe and blow it up to poster size.  I took several recipe cards and just blew them up to the size of one page and put them all on one tea towel.  I could have done this and made each one it's own tea towel, but....I didn't.
I actually made this first one for a friend.  I showed her the project and she had recipe cards from each of her grandmothers and one of her great grandmothers.  I borrowed the cards and scanned them.  I love their hand writing.  One drew a little holly leave in the corner, another had a small stain (that scanned) from years of use.  Be still, my vintage loving heart.
 After I scanned it I blew it up to fit onto an 8x10 piece of paper and then I bought some of this transfer paper at the craft store (it's 10 dollars for 10 sheets-so use a coupon and DON'T make the mistake I always make...which is to print if off 'normal.'  You have to rotate it horizontally.  The programs come with free programs that will do this for you when you upload your picture, or you can rotate pictures in Word as well...
See....the first one is done wrong, the one on the right is done correctly b/c you are going to iron it down and transfer the print to the fabric, so you need the mirror image.  
 
I bought some feed sake/tea towels at the craft store as well.  They are huge, so I actually trimmed and sewed it down so it was just large enough to hold the recipes.  
 Follow the instructions and iron it, print side facing down....
 Ta da....
 Ta da da....
 You get the point...
 I used some of that extra fabric to sew a little strip of fabric across one of the corners at the top for hanging...
See....

Crockpot Squash Casserole

Tuesday, September 03, 2013 No comments
There are a few things (probably more if I thought about it) I pursue with a passion, regardless of previous successes....pimento cheese, macaroni and cheese, carrot cake, and squash casseroles.  I have another recipe I love for different reasons, but like any mother-I love this one as much...if not more....especially because it can be cooked in a crockpot!  I put this together recently for a birthday party, it was one less recipe to put together right before the party, and man was it delicious!!  Who doesn't love a tasty crockpot meal?
Crockpot Squash Casserole
Source:  Crockin' Girls
Ingredients:  3 c. cornbread (prepare and crumble beforehand), 2 c. yellow squash (sliced, and I quartered b/c I like it soft), 1 small onion (diced), 1/3 stick of margarine (melted), 1/4 t pepper, 1 can cream of chicken soup.
Instructions:  Mix the baked bread, squash, onion, margarine, pepper, and soup.  Mix well.
Spray a crockpot with cooking spray and pour mix inside.  Cook on high for 3 hours.

Southern Pimento Cheese

Tuesday, August 06, 2013 No comments
 For some reason, maybe because I love it, I've been on the hunt for great pimento cheese recipes.  Despite having three really fabulous recipes to date....I found another one to add.  This was really creamy, and despite the name 'jalapeno' in the ingredient list, it didn't have too much of a kick (granted, I live in Texas-home of spices).  Here is another super simple one to add....I can't explain the passion, but I can attest to the yumminess of this recipe.
Southern Pimento Cheese
Ingredients:  2 c. shredded extra-sharp cheddar cheese, 8 oz cream cheese (softened), 1/2 c. mayo, 1/4 t. garlic powder, 1/4 t. ground cayenne pepper, 1/4 t. onion powder,  jalapeno pepper (seeded and minced), 4 oz jar diced pimentos (drained), salt and pepper to taste.
Instructions:  Stir together and chill.

Saint Patrick's Day: Hash Brown Casserole

Wednesday, February 22, 2012 1 comment
I love Cracker Barrell's Hashbrown Casserole, and this is as close as I've made it.  It's pretty tasty, and it passed the picky testers in my world, otherwise known as my extended family.  ...and what says St. Patrick's Day more clearly than potatoes?  Oh...leprecauns, and rainbows?...whatever, I'll take the potatoes. 
Hash Brown Casserole Recipe
Ingredients:  2 lbs frozen has browns, 16 oz sour cream, 1 can cream of chicken soup, 1 stick of butter, 1/2 c. onion (chopped), 2 c. cheddar (grated). 
Instructions:  Grease a 9x13 pan and place frozen hashbrowns down.  Season with salt and pepper. 
In a separate bowl melt butter and add all of the remaining ingredients except for the cheese. 
Pour over the top of the potatoes, and top with cheese. 
Bake at 350 for 45 minutes, or until warm and cheese is melted.