Bishop Arts District

Tuesday, May 11, 2010 8 comments

A few months ago, I read about the Bishop Art's District in Oak Cliff via Texas Highway Magazine. This magazine is going to get me in so much trouble, and I'm loving every minute....

I planned a trip, at an unknown date...in the near future. I keep a list of places in town...and out of town I'd love to see, plan to see, will see, and then will probably blog about later. ;o) It's a long list.
I've continued to read about this area on various blogs, including Lori's outing a few weeks back. It made me look forward to the outing even more! Growing up I knew that Oak Cliff was not one of the safer districts in the Dallas Area, so the closest I've been (on a semi-regular basis) is the Dallas Zoo, which is on the outskirts of this area of town. The magazine listed the improvements that have been made to this particular area of Oak Cliff, thanks to some entreprenuers that moved in and took advantage of these vintage digs. I took a Friday off work recently between State TAKS test, and State fluency test, and slept in (a little) and then headed down to check out this new/old area of town with my Mom.
We walked around the shops and buildings in the Bishop Art's District. I really liked all the colors, and the buildings themselves. It was really peaceful to wander these old streets in the morning hours.


There were quite a few ecclectic shops, trendy boutiques, and unique spots such as The Soda Gallery which has been written up quite often in magazines.

Basically, they house just about every bottled soda under the sun. You can buy them individually, by the box, by the case....whatever. I, however, bought a little bag of bottle caps because I'm pretty sure there is a project there for me somewhere! .

The new kid on the block in the district is Dude, Sweet Chocolate

Dude, the guy working at this shop was nice! He offered us some free samples, including Crack-In-the-Box-their best seller. It's a chocolate bark with a ton of different nuts.

I settled on some Russian Marshmallows

I'd go back just because they were by far the friendliest of the shop owners, but also, it's chocolate. Who wouldn't go back for more chocolate? A side note would be that most shops don't open until 11, and even at that a lot of shops had left notes on their doors they were closing at other random times, or opening a bit later, so I'd say an afternoon outing might be a little more productive as far as seeing everything inside and out within the Art District.
Zola's Everyday Vintage has some really fun dresses, jewelry, hats, and purses, and best of all....a shop cat.

They had a lot of funky little gift ideas in the various shops. Including a lot of 'recycled' products making up eclectic goodies.

The set up in the shop displays were fun too. One store had these magazine flowers surrounding their entire clothing window display.

After shopping around a bit, we ate lunch at Tillman's Roadhouse.

I read about this restaurant in Texas Highways as well. It was one of the founding members of this re-established/old community.
This restaurant's food was soooo delicious, and I am FOR SURE going back. It's one of my favorite 'finds' recently. We went as soon as they opened (at 11:30), our server was great, the atmosphere was fun...


The food was affordable, but fresh, completely made on site, and different.
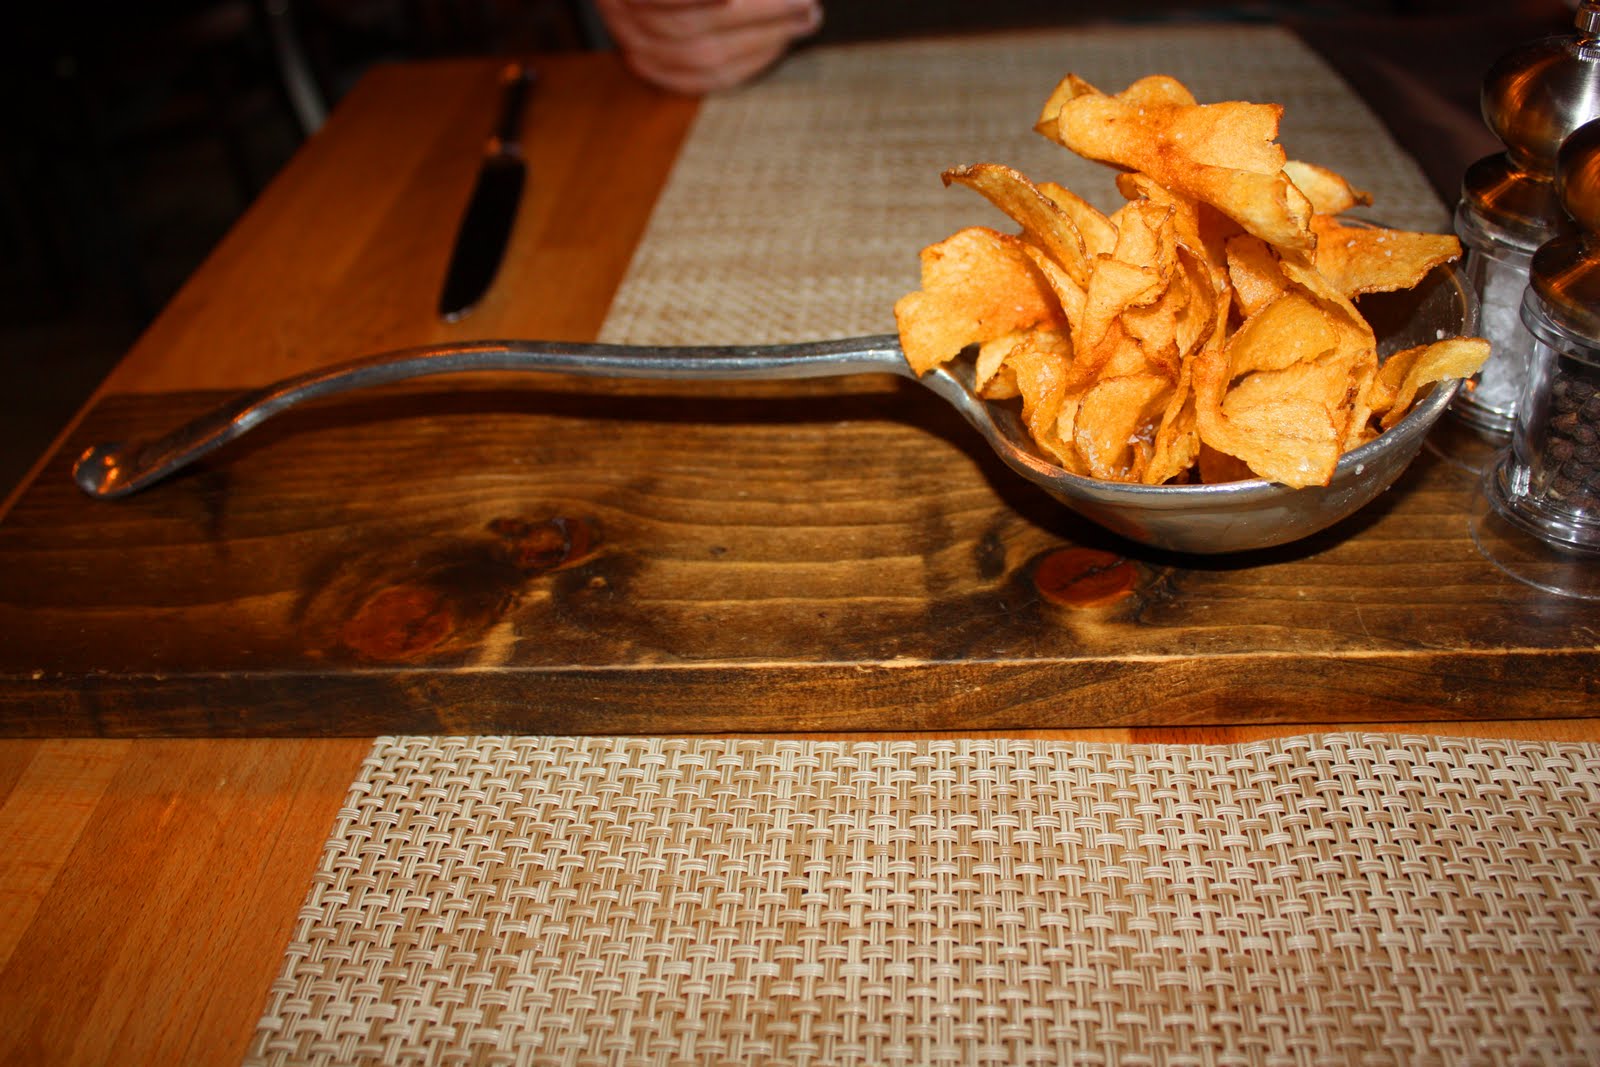
They started us out with a spoon filled with fresh potato chips.
Write-ups, and the dude at the chocolate shop, recommended the triple fries appetizer. Which we partook in...

These included homemade pickled mayo, and homemade ketchup, Sweet Potato Fries, Parmesan Fries (my favorite), and a fry with a Chili Seasoning. The problem is, 1/3 of these completely filled us up, and I didn't get to try out the 'make your own s'mores dessert.' I'll need to go back for that....soon.
Mom had a ranch salad with tomatoes and pecans that was delicious, and I had a grilled cheese with a really yummy cheese mix inside, and I substituted soup for fresh fruit.

I'm including all these pictures b/c I really like it. Really.
It was a pretty busy place to hang out, and it got busier as the lunch hour moved forward, and reservations are recommended. There were actually quite a few really great looking restaurants in this area. I understand why Texas Highways included it in areas to see around Texas. I'm definitely going back. I'm making s'mores on my next visit!
Linking To:
http://littleyayasandblessed.blogspot.com/2010/05/follow-me-back-tuesday.html

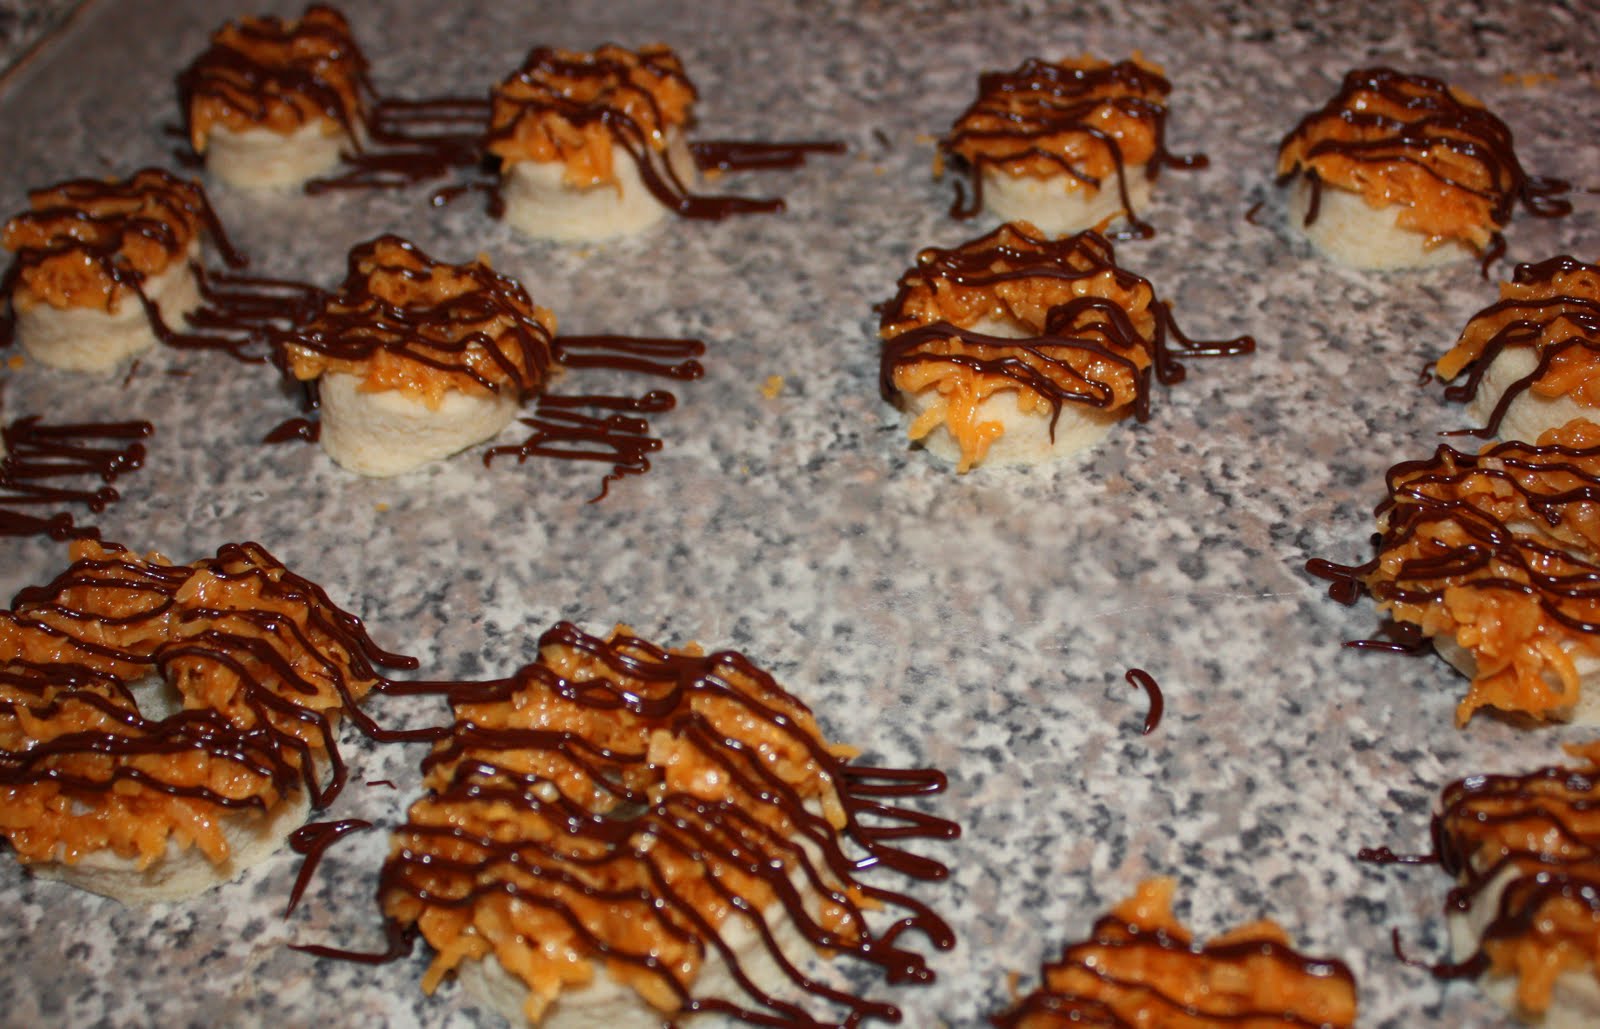
Samoa Cupcakes With Mini Samoa Toppers

Monday, May 10, 2010 10 comments

These are two facts of life that are not debatable in my world:
1. Joe McIntyre is/was the best New Kid on the Block. End of story, debate settled.
2. Samoa Girl Scout Cookies are the tastiest of the little treasure boxes offered once a year.
Knowing this, I stumbled on this recipe at Santasgiftshoppe blog for homemade Samoas (she has lots of homemade girl scout versions, and great picture tutorials). I immediately became a follower of the blog, made a comment, then added it to my 'to do NOW' pile.
I thought about how I could add some of myself to this recipe...and I don't mean inches to my hips. Adding that to myself goes without saying. I decided to make a cupcake Samoa version, and add these little beauties to the top...in mini-form. This also prevented me from having to use the stash of cookies currently in my freezer, sitting right next to my cadberry egg collection.
CHOCOLATE COCONUT CUPCAKES

I used a boxed chocolate cake mix, and just added 1 c. of coconut to the wet ingredients. I debated making a shortening cooking bottom, but I think that might have been a little extreme, even for me. I baked, per usual.
SALTED CARAMEL BUTTERCREAM ICING (3 c.)

(From Southern Living)
1. Mix 1/2 c butter (softened), 3 oz cream cheese (softened), 2 t. vanilla, 1/4 t. kosher salt.
2. Graduallay add 16 oz of powdered sugar, and 3 T of milk.
3. In a separate microwaveable bowl melt 15 caramels and 1 T of milk at 30 second intervals. Stir ever 30 seconds. This takes about 1 1/2 minutes. Fold into icing.
*I doubled the above recipe because I believe more is more.
MELTED CHOCOLATE

Melt 1 c. of chocolate chips in a ziplock bag. Pull out every 30 seconds and mash until well melted. Cut a small slit in the corner, and zig zag back and forth across the cupcakes, and cookies.
COOKIES

*I halved the following recipe.
Cookies: 1 c. butter (softened), 1/2 c. sugar, 2 c. flour, 1/4 t. baking powder, 1/2 t. salt, 1/2 t. vanilla. Mix with a mixer, and add up to2 T of milk if it is too dry. Santasgiftshop used a straw to cut the middles, I used my round fondant cutters since I wanted baby cookies.

I could have made them a little thinner. I didn't. Thin isn't exactly a word I use often. Even though I made (mostly) mini cookies, they baked about the same amount of time. Melt 1/3 c. chocolate chips, dip bottoms of cookies in chocolate, and let dry upside down before adding topping.
Coconut/Caramel Topping
1. Melt 12 oz of chewy caramels, 1/4 t. salt, and 3 T milk in the microwave. Stir in 3 c. of shredded coconut. Spread on cookies.
Chocolate
*See above. 1 c. was enough for my cookies, and cupcakes.
If you are keeping a calorie count, why? But if you are, I took these up to work for some of the other ladies who are in the midst of the testing crunch. I'm on a serious (snicker) diet, I can't have these sort of things hanging out with me. Uhhh, I've been on this 'diet' since I was 11, I might need to rethink my game plan.

Last:
Of course, after making my cupcakes, I googled this idea, and found I'm not the first...by a long shot, to think of this, but I'm OK with being a part of this exclusive club, and not the leader. I can understand how Samoa's motivated many a person in years past, and am glad to live in a world with people who share my thought process, and love of coconut, caramel, chocolate, shortening goodness!
Linking To:
Underthetableanddreaming
BetweenNapsOnthePorch

Blessed with Grace
Sweet Thursdays

Lesson's From Mom #1: God's Glue

Sunday, May 09, 2010 3 comments
Happy Mother's Day! I have seen many lovely tributes to mom in the blog world, in print, on TV....etc. I wanted to write something, but I'm having blogger's block. Do I start with my Mom's story? She has an amazing story of faith!
Do I tell you who my Mom IS?
She's pretty much the nicest person on the face of the earth. I assure you there are not words in any webster that could do her justice.
I think I just have to settle with the following short snippet of my Mom. It's is, afterall, where Mother's Day begins, with a baby.
When I was little, instead of saying, 'You're cute.' 'You're pretty.' etc my Mom always said, "I like the way God glued you together."
She often told me the story of my creation.
God has a girl factory. She visited the girl factory and picked out my parts. She would describe them in detail. The brown eyes she selected, the freckle that were painted on just so etc. Sure, there is this whole scientific theory that involves DNA strands, genes, divided cells, and chromosomes that other people hear from their parents, along with a few other facts, but I like my story best.
Now I'm going to ponder why I didn't choose science as my area of expertise in college.....

Mom's Scrapbook: In My Brother's Words

Saturday, May 08, 2010 4 comments
Mother's Day Past

I made this book a few years ago for my Mom. She actually has two of these-one with pictures of her and I from year's gone by, and this one of my brother and Mom through the years that I made her for Mother's Day two years ago. I tried to select pictures that reflected our 'growing up' years. There aren't enough pages to portray the impact. My brother helped me choose which pictures to include in his book. I scrapbooked the pages, and left tags on each page. I then gave him the 'color coordinated' pens to use with each page, and he wrote his memories. After 30 years of being my brother, he doesn't fight these assignments. I love that it's memories in his words. I think my Mom does too. I included some of his favorite childhood memories, sports, family time, holidays, fishing etc with pictures 'through the years.' Most pages had then and nows. Here are a very few selections from many pages...
Camping

You will NOT find this in my book. These experiences are truly a gift from my Mom to my brother. She grew up a city girl in Dallas with a sister, and lots of women in her world and all the activities that go along with that life style. My Dad passed away when my brother was 4 1/2, and though she knew little about the great outdoors... outdoors we went. Jason loves everything 'nature' thanks to these experiences.
Freeport

If you've ever been to Freeport, Texas, you'll have to wonder about this selection, BUT we made some really great memories out on my cousin's grandparent's farm. The first picture doesn't include my Mom, but we are there b/c she took us down that long drive so we could make these moments matter. (Check out my 80's outfit. Jealous?)
30th Birthday

For Jason's 30th, we took him out to Texas Motor Speedway to drive and ride on the Nascar track. I can't explain why this is so great, but it was. Jason's love of Nascar is just proof one of us is adopted. Sometimes, I hope it's me.
Linking To:
BWS tips button

50 Cent Crafty Sign

Friday, May 07, 2010 26 comments

I bought a plank of fence wood for some astronomical price like $1.08 at Home Depot awhile back. I had them chop it into four pieces for me so that it was 'sign ready.' This is the second sign I've made out of that lil' piece o' wood.
I don't know what it cost me to make it, but it certainly wasn't even close to a dollar. The wood was about a quarter. After my metal frame yesterday, I realized I had absolutely everything I needed to make this little craft project. I had the three buttons, black paint, white paper to cut out the letters, and recycled paper used to make the flowers, gorilla glue, and thumb tacks for creative hanging purposes, so....really....it was just about as free as any project gets.
I saw this quote, "Sometimes in the middle of an ordinary life love brings you a fairytale." painted on a large sign in a craft store for 30 bucks a few years back. It's perfect for one of my friends, but I'm skating on the line between revealing a gift early, or not sharing until I do gift this away by posting this, but I have so many gift post ready to post 'later'....I decided to go forth and post now. Plus, I'm suspicious most of my 'friends' don't read my blog. I don't know when I'll be giving it to her considering the line of gifts I have for this individual over the next few holidays. If it counts for anything (since I'm sure there is a blog tally somewhere of things that 'count') I'm going to write the family's surname and the year the family was 'established' in the right hand corner of the sign with a white paint pen, so it's not like I revealed a COMPLETED gift, right?
On to this VERY complicated craft. Get out your dictionary, you may have to look some of these complicated words, and instructions up. :Insert Snickering Here:
Numero Uno (Sorry, I had chips and salsa for dinner, and all the sudden I think I'm bilingual).
Get some guy at Home Depot to cut a piece of fence post into four pieces for free (see my prior post for this info). Paint one 4th of your fence post with paint.

I'll wait while you write down meticulous notes so you don't somehow get the steps wrong, I mean, it's a good thing I took a picture b/c I don't think the words did it justice.
:Insert Jeopardy Theme here:
Numero Two (see a little something for both Spanish, and English speakers in this step).
I took my Cricut and printed out the words I wanted on the sign, and then I used the Xerox sticker maker so they were sticky on the back, and this allowed me to manipulate my letters. I love this Xerox do-hickey-thing-a-ma-bob. I then took some mod podge to seal the top down. I could have used stickers as well, or I could haven't painted the letters....assuming I wanted a real hot mess on my hands.

Numero Three-Oh
Go and find clever people online with great ideas, and add a little something you want to try out to jazz this up a little bit like a little cluster of poppies on the side. Why a cluster of poppies on the side? Because I can.
I saw some precious little rose clusters on the blog UndertheTableandDreaming that she put on gifts over the Christmas season. She used pages from books, and I thought this was perfect, given my 'fairytale' quote on this sign. I didn't have a fairytale on hand to cut up, so I used an assertive discipline book I was recycling from my educational files. Really romantic, I know. I decided to ink the edges to give them an aged look, and add a button because that's the kinda girl I am. I also cut my spiral with a ruffle to make them rufflie after seeing this precious flower magnet tutorial onmysideoftheroom.

Circle Cut+Ruffle Cut, and Inked Edge+Hot Glue, and a little pin to hold it while it dried=3 Paper Posies

Step #4
After much debate, arguing, and ribbon wrangling....I decided on this little wire hanging using two tacks from yesterday's project, some wire, and gorilla glue to hold my wire, and tacks down.


Attach posies, and then place them in the ever growing pile of someday gifts.
Linking To:


Magnetic Frame

Thursday, May 06, 2010 14 comments

I saw this idea for a frame at McKinney's Third Monday. Frames are one of my favorite things to give, and my friend's will back me up on this, with a groan. I guess it has something to do with the fact that I love taking pictures!
The frames I saw at 3rd Monday were much more polished, but for the price of 1 frame (20 bucks) I will be able to make 4. I've only made ONE so far, but I have all the pieces to make three more. If it were not for the fact that I'm 4 years ahead in making Christmas gifts, this would be slightly 'better news.' Kidding...sort of.
The most 'different' thing I did this crafting go round was play with metal.
I found this 26 gauge metal at Home Depot. I had a stroke of genious, and instead of buying sheet metal cutters I'd use exactly once, I asked some of my friends to ask their husband if they had these in their 'weapon supply.' It's the best of both worlds, the benefits of a husband's tool box, without the laundry. One friend's husband had TWO pairs.

I also bought some tacks....to be discussed a little further down. I cut the metal in half, and then each half in half again. I got four sheets of 6x9 inches of metal. It was not THAT difficult to cut, it was just difficult to cut straight. I finally remember I wasn't really aiming for perfection, and I left it to the best of my imperfect standards. I also cut off the tips of the tacks with the metal cutter. A) Because it was fun to cut metal, and B) Because I couldn't get them to hammer through the metal, and I needed them for aestetic purposes.
I then went back to Home Depot. My plan was to go to the wood scraps section. I made three pumpkin signs from that little treasure box last Halloween for half a dollar. They didn't have the size I needed, so I found a 4 by 12 inch piece for five bucks. The guy who was working in the wood told me they make the cuts for free. This saved me lots of time. He cut it into 4 equal pieces. I snuck a picture in with my iphone. This is what it looks like when someone saves you a bunch of time.

I then took the first wood piece and decided to aim low. I painted it black with some Americana Paint. It took about two coats, and then I took white paint and smeared it on the edges (I just smeared this on with my finger to make it look a little 'aged,' and to make my hands look a little more colorful).

Notice I didn't use chalkboard paint? I thought a magnetic/chalkboard frame was perhaps a bit much. Check my temperature, I don't even KNOW myself anymore!
I wasn't really sure how my trusty superglue would hold with this heavy metal, and wood. I sometimes struggle with super glue and wood, so I bought some gorilla glue.

I put a 'squiggley' bit on the back of the metal, and then pressed it down on the wood. I put some weight on top, and let it dry. I also dabbed some gorilla glue on the tacks, and I did hammer them down a bit. This allowed them to sit flush against the sheet of metal. The thing with gorilla glue is that is goes on a translucent amber color, but it 'foams up' into a white....well, foam. It spilled a little bit out of the tacks, but it was easy to peel off the excess, and the rest held really well.
Next up....I printed off a little message. I used my cricut, but I could have used paint, or stickers. My family usually gets the remnants of my first crafting attempt, so....'family' just about covered anyone that might be getting this. I mod podged the whole thing so it had a bit of a gloss.
I then made some magnets. I used a Creative Memories punch the size of my magnets, and some black scrapbook paper. I mod podged the paper down, then put a diamond glaze layer on top.


The magnets allow me to stick pictures on of my family, and then remove them and replace them when the posted family member makes me unhappy. Kidding! ;o)

I can think of at least one more I'm planning with a fun paper backing instead of paint....and then I have two more 'in-waiting.' I'm sure they won't have to wait long before the need arises to put these last two together.
Linking To


Somewhat Simple
Fun to Craft
Funky Junk