Baked French Toast

Wednesday, December 31, 2014 No comments
I'm always looking for a way to simplify my life.  Anytime I can let the oven do the cooking and not have to stand over a skillet....and still get something yummy out of the deal-count.  me.  in.  I recently saw this recipe at sheldonrachel and gave it a go.  Yum.
So...if simplifying your life...or french toast is something you'd like to start out your new year....try this one...
Baked French Toast
Ingredients: 1/2 c melted butter, 1 c. brown sugar, 1 loaf of Texas toast (thickly sliced bread), 4 eggs, 1 1/2 c. milk, 1 t. vanilla, powdered sugar and maple syrup for topping your toast.
Instructions:  Add your bown sugar to your melted butter and spread at the bottom of a 9x13 inch pan.  Beat your eggs, milk, and vanilla.  Lay a single layer of bread in the bottom of your pan (I squeezed in 8 slices).  Spoon half of your egg mix over the bread layer.  Repeat a second layer of french toast.  Spoon over the remaining egg.  Cover and chill overnight (or for several hours so the egg soaks into the bread).  Bake at 350 for 45 minutes.  (Keep it covered for the first 30 minutes and then remove your foil.).
Slice into squares, and decorate with powdered sugar and/or maple syrup.

Plastic Bag Wreath

Tuesday, December 30, 2014 No comments
 I was tasked with putting together some 'snow' themed projects for an upcoming Good Morning, Texas.  Here is number one.  I actually saw a wreath like this at my friend's house.  She said she saw it online somewhere.  She used a wire hanger she had pulled down into the shape of a circle.  I googled it and found a board with a wreath like this AND a bunch of other things to do with plastic bags.  You can cut and use grocery store bags, a large laundry bags, or....I bought a box of 150 bags for a buck at Walmart (the non sealing kind).  Instead of a hanger, I also found a wreath frame for a dollar at the Dollar Tree.
I squished the bags (I put the open flap on the inside so it was a little shorter this way, but much more even-I tried it both ways and found this looked the best).  Then I just went around tying knots.  I only tied knots on the inside three rings-I didn't need it as fluffy as four rings for the place it's going to live.  It took me about 30 minutes, but it's pretty brainless, goes faster the longer you work, and you can catch up on random TV marathons like Finding Bigfoot or American Pickers.    Not too shabby for 2 dollars....and now....bring on the snow-my wreath is ready for 'ya ol' man winter.

Pepperoni Puffs

Monday, December 29, 2014 No comments
Here's a super easy/last minute appetizer I've stuck together for football watching parties and New Year's Eve.  You can never go wrong with pizza.  And if pizza is wrong...you need new friends.
Pepperoni Puffs
Ingredients:  1 can junior biscuits, 40 pepperonis, 10 cheese cubes, butter and garlic salt, pizza sauce.
Instructions:  Pull the top and bottom of the biscuit apart.
 Place 2 pieces of pepperoni with a cheese cube on top.  Place another two slices of pepperoni on top of the cheese cube.
Place second biscuit half on top of pepperoni and press the sides.  Seal well.
Place biscuits in a pan.  Place remaining biscuits side by side.  Spray or brush with butter and sprinkle with garlic.
Bake biscuits according to the time/temp on your biscuit can.
Serve with pizza sauce for dipping.

New Year's Eve Confetti

Friday, December 26, 2014 No comments
 Here's a simple little idea for New Year's Eve-whether you are going out or staying in-a packed up little confetti toss for midnight.
They sell little boxes like the above at stores like Hobby Lobby, or you can wrap match boxes in fun scrapbook paper.  Fill each with confetti and take these along to toss at midnight, or pass these out to guest to celebrate at midnight.

Dark Chocolate Clementines

Tuesday, December 23, 2014 No comments
I saw this recipe last year via food network.  I heart clementines.  They are sweet without all that seedy/stringy mess that comes with their big brother, the orange.  I puffy heart dark chocolate, so marrying the two was genius.  I melted the chocolate, dipped my oranges and added a little sea salt. Salty and sweet oranges.  It's a pretty healthy for you 'bad' snack...or so I tell myself.

Free to a Good Home: 2015 Calendar Printable!!!

Monday, December 22, 2014 No comments

My super talented friend, Kelly, made these super precious 2015 calendars for *you.*  Because she made them on behalf of all things I love, there is even a precious little list column on the side where you can add special events, a grocery list, or general to do items.  HERE is the link to the free printable.  12 months of utter cuteness!  Above is just a sampling of what one page looks like!  Free, free, free, just because!

June in December

Sunday, December 21, 2014 No comments
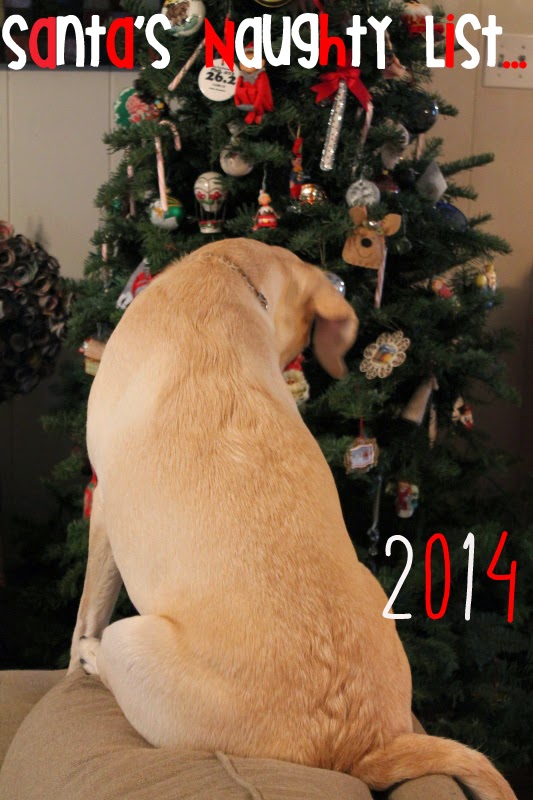
No thought bubbles necessary.  I only put half of my ornaments up....all at the top of the tree, but she wasn't deterred.

Last Minute Christmas Dinner Ideas

Friday, December 19, 2014 No comments
 Last year, the Texas family was blessed with some little California visitors under the age of five.  I knew they'd enjoy a few extra details on the table to keep things merry.  For Christmas even I filled mini stockings I grabbed at Hobby Lobby with napkins, silverware, and Santa Chocolates.  It was a big enough crowd that I had to pull out the long tables formerly used for crafts, and the fancy plastic table clothes.
 I was exhausted by the time Christmas rolled around, so I bought some cupcakes from Gigi's.  THESE were a huge hit.
 Maybe someday I'll try my hand at piping this, but....for this year....I'm glad someone else did the work.  Worth.  Every.  Penny.  These also doubled as my breakfast on Christmas morning.
 And then I put together a little hot chocolate bar.  Instead of marshmallows, I snagged some reindeer peeps....and some of my favorite accessories-whipped cream, chocolate mints, and some Santa straws (from the dollar store) and these little deer cups (from Meri Meri).

MistleTOES with Printable

Thursday, December 18, 2014 1 comment
I know this isn't an original idea.  I've seen it all over the net the last few years, but last year it was the perfect gift for my cousin-in-law.  Every time she comes into town, we go out to get our nails done.  I put together a little something for her to enjoy when we don't get to treat our feet together.  The idea isn't new, but I made a free printable to share with anyone in need.   Socks, nails polish, files, whatever....who doesn't like to treat their feet?

Snowman Gifts

Tuesday, December 16, 2014 No comments
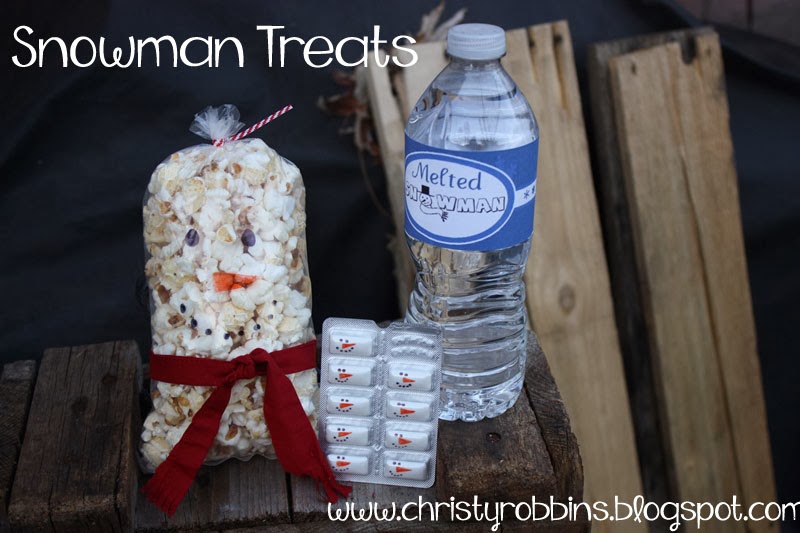
 Last year (in January, actually) I put together a little snowman gift pack for my secret sister at work.  She was a fan of sweet and salty, so I got her a little bag of kettle corn.  I drew a snowman face on the back, and tied a little ribbon around it for a 'scarf.'
 I drew some snowman faces on some gum as well.  I got the idea for this on Kerry's blog.
 ...and I found a free melted snowman printable here for a water bottle.

Homemade Gift Ideas

Monday, December 15, 2014 No comments
I'm headed to GMT with three ideas for homemade gifts.  This year-the theme is to say it with food.  Below are the links to the three projects, and the instructions/recipes etc can be found in the links. I'll also post the segment on my facebook page later.  This should be my last segment for the year, though I prerecorded one a month or so back that will run at some random time in the near future.  Never fear (,mom,) I've already got my schedule for 2015, so I'll be lugging craft ideas with me to GMT for at least another year, and I've got some ideas I'm excited about, but first.....let's get through today.  :O)
 Snowman Belly Pretzel Jar

Popcorn Gift Set

Saturday, December 13, 2014 No comments
I'm a few gifts, and a few cups of icing away from finishing most of my Christmas gifts this year.  This set is also going to be recycled for a healthy New Year's Snack at work....
I filled mason jars with popcorn kernels.  I also added little jars of oil, and then I bought salt shakers at the dollar tree and filled them with a bunch of different seasonings.  I added some popcorn bags I also found there.  The popcorn has attached instructions-basically-pop it, add to a bag, drizzle with oil and your choice of seasoning-shake and enjoy.
Here is a free printable with the labels and instructions.
Recipes for the seasonings:
Taco Seasoning:I bought a package of taco seasoning and just added it to the jar.
Cheesy Garlic Seasoning: 5 T cheddar cheese powder, 1 T sea salt, 1 1/4 t garlic powder, 1/4 t cayenne pepper
Italian Herb Seasoning: 4 T Parmesan cheese powder, 2 T sea salt, 2 t. red pepper flakes, 1 t dried oregano, 1 t garlic powder, 1 t dry basil
Smoky Curry Seasoning:  1 T smoked paprika, 1 T curry powder, 2 T salt, 1 1/2 t cumin, 1 1/2 t cinnamon
Mexican Chocolate Seasoning:  2 T cocoa powder, 4 t powdered sugar, 1/4 t cinnamon, 1/4 t salt
Cinnamon Sugar Seasoning:  2 T white sugar, 2 T powdered sugar, 2 t cinnamon, 1/2 t salt

Snowman Jar

Friday, December 12, 2014 No comments
Sometimes you need a cheater Christmas gift.  Every year I've got a list of things I plan to put together for people....and then November comes....and December slips in and it's time to give out gives and I'm all out of time to make those gifts.  I cheated and made this little jar, which I saw here a few years ago.  The innards are white pretzels...which brings up my cheating-I bought them. I found them for a few bucks at the store already dipped and thought-you know....I'm pretty sure mine aren't going to taste 'better', they will just take more time, so I bought them.  I think packaging pre-made food in a cute jar makes it OK.  I have drizzled them with an alternative color of chocolate before to make them a little more gourmet, but....this year....I'm leaving them snowy white.  I also made some tags I'm attaching to these little guys.  You can download those here.  I took some scraps of fabric and tied them around the lids of my jars and fringed the edge.  I glued three buttons down the jar and ta da-frosty's belly is filled and one or three more gifts are knocked off my list.

Grinch Cookies

Tuesday, December 09, 2014 No comments
A friend gave me a recipe for cake batter cookies years ago I've made off and on.  I've seen these green cookies popping up around the net in honor of the Grinch, so I decided to use her recipe and dye them green.  There are several different variations, but this is a recipe I like.  The cookies are easy to put together.  They turn out really soft and moist.  I brought these to my work cookie exhange last year.  
Grinch Cookies
 Ingredients:  1 box of vanilla cake mix, 2 eggs, 6 Tablespoons of butter, green food coloring, 1 cup powdered sugar, 1 teas. cornstarch
Instructions:  Heath oven to 375.  Melt butter and let it cool.  With a mixer mix the cake mix, butter and eggs.  Add green food dye to desired color.  Roll int 1 Table siz balls.  Roll each in the powdered sugar and cornstarch mix.  Place on parchment paper covered cookie sheet.  Bake for 8-10 minutes.
Makes 3 dozen.  

Reindeer Noses

Monday, December 08, 2014 No comments
 I made these last year for some of my friends who like cake balls.  I decided the egg carton was the perfect deliver system for my reindeer noses.  There are 12 holes, and everybody knows there are only 9 reindeer, so I filled the other holes with bells.  I could have looked for some cute reindeer candy or don't some Santa belly cake balls, but I was iced in on the days I put these together, so....I'm pleased with this. I made cake balls using these simple instructions.  I did 8 chocolate with chocolate, and one red.  Simple and super fun.

Glitter Mug

Friday, December 05, 2014 No comments
 I went to GMT today with things that glittered.  I shared glittered champagne, silver nutcrackers, and this diy glitter mug.  The third craft is usually my filler b/c there is nothing scarier that filling dead air, so...I had to rush this one a bit.  It's a super simple diy project though.  I originally saw one here and was fascinated by the fact that it's dishwasher safe.  I found white mugs at Walmart for 88 cents.  The only other thing you need is glitter (I really like the finer glitter), and decoupage paint and SEALER (I got the glossy seal).  I'm sure they have multiple brands, but I found some at Michael's in the Martha Stewart section and used a coupon.
 Tape off the bottom portion of your mug (including the handle) with painters tape.  Brush on decoupage glue and then sprinkle it.  After it dries, go back and paint over your glitter with more decoupage glue (about 24 hours later).  I actually did this several times (and waited a day between each painting-if you have the luxory of time, do that)-this is the process that makes the glitter adhere so your mug can be washed.  If you can wait 10+ days before you wash it, that's even better
Peel off your tape, fill your mug, go. make friends happy