Brownie Cookies

Thursday, March 31, 2016 No comments
I recently needed a quick dish to bring to a potluck.  My secret sister at work had given me a box of brownie mix and a cute little stirrer.  I googled some ideas for stretching the box to make a little more that the 12 brownies...9 when I'm done cutting them.  I found the recipe for brownie cookies using a brownie mix!  What?  They really were good.  I baked several different trays, and I found if you undercook them they are even best, so just a minute or two before they say to take them out....when they are still a little wet in the middle-pull them out.  Raw brownies are always best!  So...if you want to stretch those brownies or need a last minute dish...try these!  The original recipe is from somethingswanky.
Brownie Cookies
*makes 2+ dozen cookies

Ingredients:  18.25 oz brownie mix (just the dry mix), 2 eggs, 1/4 c. oil, 1/4 c. flour, 3/4 c. chocolate chips.
Instructions:  
1.  Heat oven to 375
2.  Stir together all the ingredients until smooth.  Add the chips last.
3.  Drop 1 T size balls onto an ungreased cookie sheet.  These spread some, so leave 2 inches between each cookies.
4.  Bake no more than 9 minutes!

Hawaii 2016

Tuesday, March 29, 2016 No comments
 My Mom and I went to Hawaii over my spring break.  It was the last celebration lined up to celebrate her retirement.  Any excuse to go to Hawaii.  I know I'm in a minority, but Oahu is my favorite island.  We said last time that we would go to Maui next time....and then when it came time to book the trip...we booked Oahu.  I guess I'm a city girl at heart and you get the best of both worlds here.  Maybe next time, Maui, maybe next time.
 I love all the people.  I love the lines of surfboards where there would be bikes on the mainland.
 We did take a day trip to Kauai.  I had NOT visited Kauai, but I agree it's beautiful, and quiet.
 A grand canyon in the pacific, who knew?
 And the fern grotto, I love the personality of each island-so different and distinct.
Then it was back to Oahu.  Mostly we spent the week doing nothing, but we did rent a car and head to the North Shore one day.  A few weeks before they had 50 foot waves and the Eddie (thank you, El Nino).  They were about 15 feet the day we were there, but they never fail to impress in the winter, but...you just can't capture that sort of power on film.  But...check out how big they are AT the shoreline.
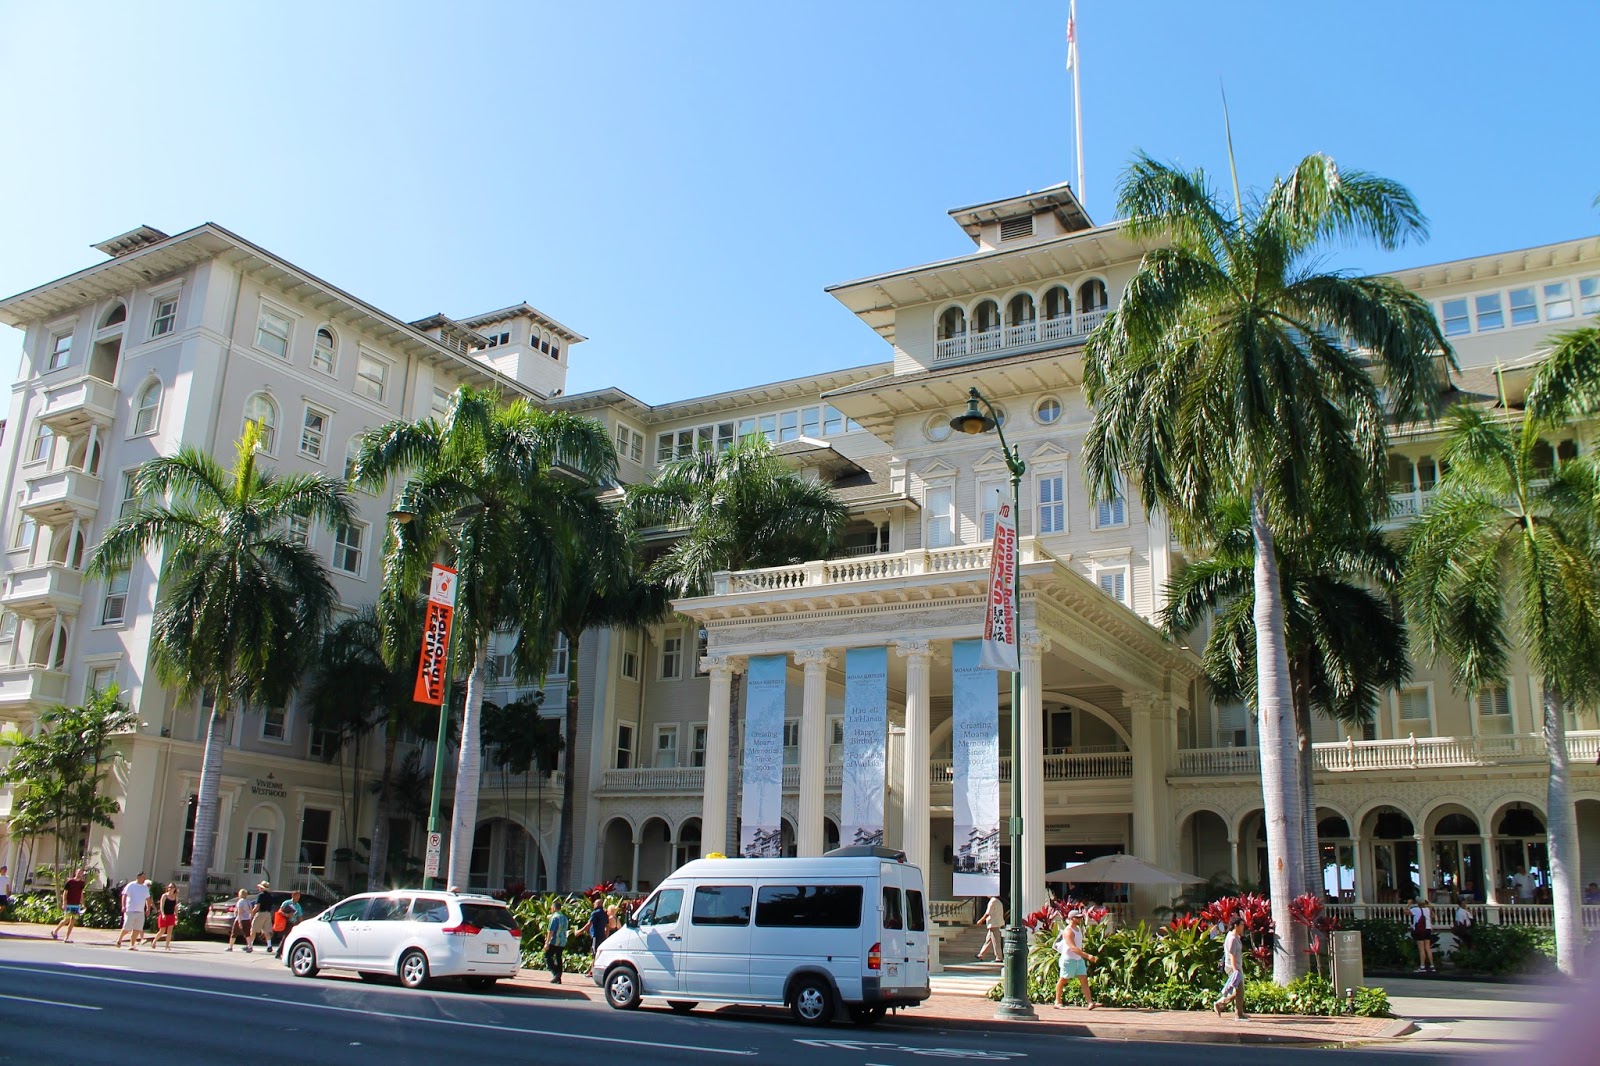
 I had enough points on American to fly for free, so we carried over our savings and stayed at some fun places.  We couldn't pick which hotel was our favorite, so half the week we stayed at the Outrigger Main, with a hot tub overlooking the beach.  The last half of the week we stayed at the Moana Surfrider with an unobstructed view of Diamond Head, those great rocking chairs, and a banyon tree covered back patio.  I can't pick a favorite.
 But, here's the view from Moana at sunset with the banyan tree below and my favorite view ahead.
 This year I tried out the Hula Pie at Dukes, better than it even looks.  If you are visiting, I really like Duke's for casual food, they have a great breakfast buffet, we discovered the Hula Hut this year (yum), and my all time favorite is the Shorebird at Outrigger Reef with a grill where you grill your own food in the evening with an unobstructed view of Diamond Head.
 I also love that there is a breaker wall built on part of the beach where you can swim without the currents and waves.
All I can think about is going back.  It will be Maui next time.  Or Oahu.

Crockpot Fajitas

Monday, March 28, 2016 No comments
I recently read different variations on crockpot fajitas.  I took the easiest of them all.  I cut up a large onion into slices, a green pepper, and a red pepper into strips and I dumped them in the bottom of a crockpot.  I then took two large, uncooked pieces of boneless chicken and dropped them on top of the veggies.  Last, I took a taco seasoning packet and sprinkled it over the whole thing.  I set it on low to cook for 6-8 hours (or high for 3-4).  You just want to make sure the chicken is cooked through and the veggies have softened.  Mine was fork ready to shred.  I tossed it all into flour tortillas and topped it with all the calories good stuff.  Seriously, so delicious.  Feel free to add more chicken and more veggies.  The skies the limit, but the key is, a packet of taco seasoning did all the work of a lot of fancy slicing, dicing, seasoning, and sauteing.  (OK...not really sauteing, but it went so well with my list).

Wooden Cross

Friday, March 25, 2016 No comments
Happy Easter!  I made a wooden cross this year for the yard.  I cut the design out of some plywood with a jigsaw and then I painted it with some white house paint.  I then painted over that with brown....and did a white wash (water and white paint) brushed on top of all of that to give it a streak-ie look.  I put a coat of polyurethane over the whole thing.   I nailed it to a yard stake and added a ribbon to the center.

Vegan Oatmeal Cookies

Thursday, March 24, 2016 No comments

Disclaimer-I am not a vegan, but sometimes I want to share my calories, and my brother is currently at my house.  He's skinny.  He's a vegan.  (Do the math.  AND he will eat my temptation.  I wanted a couple of cookies, but I knew if I wanted to push them off on someone I needed them to be vegan.  Oatmeal cookies are the perfect cookie to do that with b/c one of my favorite substitutes when baking vegan is flax seeds, the grains aren't as noticeable when you pair them with oats.  I took a basic recipe and substituted a few ingredients for the eggs and butter.  If you just want a basic, chewy recipe, but like your dairy, just replace the flax seed/water with the egg, and vegan butter with regular butter.  Some vegans don't do vanilla (long story, but from what I've read, the initial problems aren't present in what we use today-it's your call), but you can use an almond extract if you would rather.
For vegans, or hungry people, here's a good recipe for chew oatmeal cookies....
Chewy Vegan Oatmeal Cookies
INGREDIENTS: 1/2 c. vegan butter (softened, NOT melted), 1/2 c. sugar, 1/2 c. brown sugar, 1 T ground flax seed, 3 T of water, pinch of baking soda, 1/2 t. vanilla, 1 c. flour, 1/2 t. baking soda, 1/2 t. salt, 3/4 t ground cinnamon, 1 1/2 c oats (not instant)
INSTRUCTIONS:
1.  Put flax seed in 3 T water and set aside for about ten minutes.  After ten pinch add a pinch of baking soda to the top and then add to the dry ingredients.
2.  Stir together butter, sugar, brown sugar, and baking soda.  
3.  Add flax seed mix, and vanilla. 
4.  Add in flour, salt and cinnamon.  Once it's blended, stir in oats.  
5.  Place Tablespoon size drops on a baking sheet and bake for 375 for ten minutes (until just browning around the edge). 
*makes 18 cookies

Easter Diorama Sugar Cookies

Wednesday, March 23, 2016 No comments
 I've been in love with diorama eggs for years now.  I have a million projects I want to try, and I'm taking the first few to Good Morning, Texas today.  I'll post the video later on facebook, but....in the meantime, here are the pictorial step by steps for these cookies.  I originally saw the idea here.
I used the recipe for my favorite cookie dough (it holds it share really well) and two egg cookie cutters I got at the craft store.  If you don't have time to get cookie cutters, just use two different size plastic eggs that open on the sides to cut out the shape.  
I cut out the larger eggs, and out of half of them I cut out the smaller shape to create the hole.
I have a great icing recipe, but this time, I lack time to pull that one out, so I used a jar and added a Tablespoon of some karo syrup (this allows the icing to harden so it can be bagged.  I iced the bottom cookie.  
 I stacked and then iced the top.  You can make them any color you want.  I kept them simple.
 I let those dry, and then I did make up my favorite recipe for piping (attached in the original recipe link above).  I took some random leaf tip and just squiggled it into the hole for grass, and other random star tips (or just snipped the edge to leave it round) to pie around the edges.
 I also bought a bunch of royal icing decorations from a local cake store.
 ...and I bought some from the craft store...along with some jelly beans and Easter chocolates.
 I placed these inside the 'hole' and mixed it up to make lots of fun little scenes.  I let the icing dry, and then bagged them up.  Now to identify my favorite friends.  :O)

Sugar Eggs

Tuesday, March 22, 2016 No comments
 I've wanted to make a diorama sugar egg for years.  FINALLY, I forced myself to have a go at it.  It's my theme for Wednesday's GMT.  I've got several forms, and have several more I want to try, but time was an issue.
The supplies you need are 4 inch (or whatever size you want) plastic egg halved length wise, 1 egg white, food dye, 3 1/2 c. sugar, 1/2 c. powdered sugar, royal icing (whatever ingredient is your favorite), and royal icing decorations, jelly beans etc.
 Place your egg white in a bowl and add the food dye.  Make it darker than you think it should be because it won't be this bright when you add all the sugar.  Whip it around until it's foamy.
 Mix it with a fork until it's blended.  It will be really sandy looking.
 I found this egg at the dollar store-it had bubble supplies inside.  You can also buy plastic forms from cake decorating stores, but....this one worked for me.  Put sugar and press firmly into both sides of the egg.  Flip over on a baking sheet and bake at 200 for 20 minutes.  Pull out.
 Scrape out middle with a spoon.
 On one half, once you scoop out the inside, poke a hole in the middle with a knife from the curved back and gently saw a circle with your knife.  It doesn't have to be perfect b/c you are going to cover the edges with icing.  This is the part I did a little too forcefully at first and I cracked my first egg.  After you have your two halves carved.  Place them in the oven again and bake for another 20 minutes to really make it hard.  Each recipe made 2 of the 4 inch eggs.
 You can seal the two sides together with royal icing and then decorate the inside.  I used these premade royal icing decors I found at the craft store.  I just threw a bunch of jelly beans in the egg too to make it fuller, and then some green royal icing for grass.  I piped along the seam where I pressed the two eggs together, and more around the hole.  You can make these as decorate, or plain as you want.  Here's a few from the side.  I had a friend who used to make these for Easter and personalize them with names.  Maybe next year...

Plastic Egg Remake

Monday, March 21, 2016 No comments
 I bought a ton of bags of plastic eggs for 88 cents and was tasked with the job of making them over.  I'll be sharing those tutorials today on GMT.  I post taped the segment b/c I have a conflict, BUT I'll post the video here later on facebook.  Sorry for the terrible photos, I guess studio lights and iphones weren't made for each other...or maybe it was the holder of the iphone on this particular day.  It's been a busy month....random/last minute iphone photos was all I had left in me. 
I blinged out some eggs with glitter (and modge podge) and sequins (and a glue gun).
 I sprayed some eggs blue and flicked brown paint on them to give them the robin's egg look.  These would be super cut in a centerpiece, but....I wasn't up for bringing a whole tablescape to GMT this time!
 Shabby chic with twine and lace.
And....glow in the dark.  For this guy I filled it with candy and a glow bracelette.  I found them in 12 packs at Michael's for 1.50, or some Dollar Tree's have them.  A fun nighttime Easter egg hunt is in my near future.  :O)

Mom's Retirement Cookies

Saturday, March 19, 2016 No comments
 At the end of January, my Mom retired!  Whoo hoo!  29 years at the University of Dallas.  Many more years than that in the work world.  I threw her a little family party I'll post about later, but I also ordered these adorable cookies.  I did a bunch of searching and found two cookies I loved online-a typewriter and a cookie (originally part of a Mother's day set) that looked exactly like my mom...if she were a cookie.
 I emailed a bunch of cookie companies that totally ignored my email just inquiring about if they were able to take orders at the end of January.  I googled and found a company called DallasCookieCompany who A) responded right away and B)  were willing to do exactly what I wanted.  I don't get anything for telling you this, I just want Dallas folks to know there are good businesses out there!  The cookies were tasty too.
 And adorable.  My Mom has always had a typewriter in her office.
 And then these adorable retirment and congrats cookies.
Seriously, precious cookies.  I sent them up to my mom's office on her last day of work and to a few other places she frequents to enjoy with her friends.