Category: Kitchen
Showing posts with label Kitchen. Show all posts

Fruit Tea Towels

Monday, June 16, 2014 No comments
 There is nothing different or unusual about this project, but I've always wanted to do for a long time.  always shuffle through the tea towels at antique stores.  I love the days of the week and series towels, so I finally decided to make my own.  I bought one of the Aunt Martha patterns for these fruits and the tea towels from the sewing section at the craft story.  The great thing about the patterns is you can use them several times, you just use a hot iron to press them onto the fabric to get the pattern on to sew over....and then 8,675 hours later (not hard, just time consuming, but great for plane rides and waiting rooms)...
 I even made a few to give away, and I put these in the berry baskets I bought awhile back....
 ...20 years from now...maybe you can buy my tea towels at the antique store!

Sea Shell Print Napkins

Tuesday, August 13, 2013 No comments
 Another little sea shell craft.  I love collecting shells, but there is only so much room to store them, so...here's another project....I made napkins out of a few shells I've collected to make a table setting.  I took some cloth and just sewed the edges down, though you could buy some cheap linens at the super center...
I found the color I wanted my shells to be and added a little paint called textile paint.  You add it 1 part to 2 parts paint.  Mix it together, use it, and when it dries, run an iron over it to make it 'set' and at this point the paint is washable.
 I painted the shell I wanted to use, enough on the lines I wanted to push down, but not so much that it filled the grooves or it would be really blobby.  I practiced a few times on other scrap fabric.
 ...then pressed it to the corner of a napkin.
This would be a cute way to make stationary too.

Vintage Door and New Buffet

Tuesday, January 01, 2013 2 comments
Here is my something new done with something old for the new year.   This is my current work in progress....I have a lack of serving space, really, a lack of anything in the kitchen storage department.  It's a big enough kitchen for a single, but not large enough for the occasional dinner, and the storage is certainly lacking.  Though it means less space, my sanity was saved when I found this narrow, roomy buffet I could store stuff in via IKEA.  I've been haunting antique stores, and it's still my hope to find something someday but ten years later....I can live with this until I find that 'perfect' antique.  It will, maybe, someday get a coat of paint, but for now it just gets a spot. 
What finally motivated me to grab it was the door.  I originally had these Women and Wine paintings in my dining room that I was going to 'someday' get framed.  Ten years later.....
 I found a door to steal their spotlight instead.  I have coveted this door at this little antique shop in Palestine, TX.  I gazed at it for over a year before I finally surrendered to the inevitable.  It was the perfect colors.  I went to Home Depot for hanging advice, and I ended up using the hinges in place and these dry wall anchors, so much easier that I imagine, and no damage done to the door. 
 This is hand carved, and once probably lived on a pantry door.  I love the lace pattern in the stain glass and those jewel tones are what did it for me. 
 I'm still working....finding little stuff like these draws to house some of my favorite cookbooks. 
 I'm also working on some colorful Pyrex bowls....I'm still missing red.  It's almost a national emergency....almost....
I decided to post my version of  an 'old door' in my house....and also the beginning stages of some new dining room fun to get me to finish the project....

eat Plate

Saturday, June 25, 2011 1 comment
I've seen a couple plates with this life altering saying written across them throughout the net, including a super cute buy on Lori's blog.  I didn't know where I could buy my own, and so I used the process of pencil/stencil/ceramic pen that I used when making my face plates (instructions here).  I printed out the word eat,  penciled, then ceramic markered it on the plate, baked on 'eat,' and now I'll never have to be confused about what I'm supposed to do when I find food on this plate.  I'm gathering a collection of red/white/black plates for my kitchen....because I can. 

Fresh Cupcake Kitchen Sign

Friday, February 18, 2011 29 comments
I was messing around on the net one evening, and I came across this blog, Miss Mustard Seed.  I started exploring her house, and I fell in love with a sign in her dining room, it spoke to me. 
I went down to Goodwill on the hunt for a frame I could spray black, and frost the glass. 
I paid too much for the this frame considering there wasn't a back, but it was already black, and the proceeds go to the Goodwill, so, fine.  There is some irony in buying these empty frames b/c once upon a time I would have thrown away frames that didn't have all their pieces, and I can't even count the number I've donated through the years when I was 'finished' with them. 
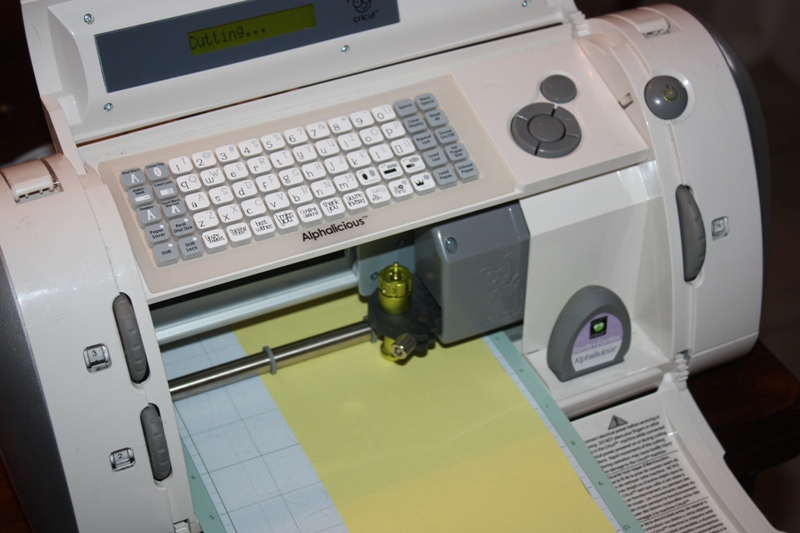
I used my cricut to cut out my life long kitchen mission:  fresh cupcakes.
I ran the letters through this xerox machine.  They make the back sides of things sticky, but they can be repositioned pretty easy on paper, and relatively easy on glass. 
I had to do a lot of repositioning. 
In the past, I've used a bottle of etching paint, but I finally decided to try the spray paint kind.  I found this can of Krylon glass frosting at Michael's....it's 101% better than the painted kind, no strange streaks! 
I sprayed, dried, and then pealed away my letters.
I used a wet qtip to wipe away any sticky residue.
I then set it in the frame, and ran hot glue along the edges to hold it in place. 
It looks the best when hanging so light can shine through, but for now....it's hanging on my wall, I'll move it eventually, it just needs the perfect hanging ribbon, and you just can't rush decisions this important. 


My Kitchen

Saturday, February 12, 2011 10 comments
Welcome to the ship's galley my kitchen.  These are the pieces old and new, finally put together. 

I put in new counter tops this past November, but my blog was so full of post ready to post regarding Thanksgiving/Christmas, I decided to put this post off.   I didn't change a whole lot.  Red has always been one of my favorite things.  These are the things I already had in place: 
This mixer is pretty much where I decided to go with decorating. 
Behind most of the cabinet doors, and drawers are red dishes, utensils, and the basket houses tons of different red dish clothes. 
I also have some bowls that don't fit inside the shelves of the cabinets (because there aren't many shelves total)...so I house them on top of the cabinets. 
Don't be jealous of the popcorn ceiling.  If you stick around long enough, one will probably pop down and you can even take a little piece home with you to show your home designer so you can get them to schedule a little popcorn spray in your house. 
By the way...I'll never have enough red and black bowls.  This is just the tip of the iceberg. 
I also snagged this stained glass ten years ago.  I heart it. 
It's from a house in England.  If I were a stained glass...this is exactly how I'd want to look.  Chippy, a little off balance, not too fancy, with a little pop of fun.
I have quite a few little piece of 'art' in each room of my house, but this is my favorite in the kitchen. 
I got this little guy at a boutique in Carrolton.  There were a bunch of pieces, each were made of 100% old pieces of junk.  Every nail, wire, and piece of wood is old...I know how it feels to be mad of old parts these days. The artist uses pieces of old wood to carve out a heart.  The slogan is: 'old parts to make new hearts.'  This appeals to everything inside of me.  It's old, each piece had a story before it was the art it became.  It's red, and I puffy heart it, and someday...I'm going to use some old parts and make some more new hearts of my own. 
Next up for the kitchen...new paint....and 'something' above the fridge to house all the red lidded flour jars in a neater fashion.  No time soon....just next in the line of 'kitchen things to do...someday."

Burlap Wreath

Sunday, January 23, 2011 10 comments
Amanda and Taylor told me about this wreath tutorial they found on line for a Burlap Wreath.  It's so disgustingly cute, I can't even stand it.  I have about six wreaths in every room of my house, and 58 in my garage, but I 'needed' a wreath like this.  The flowers on top can be exchanged each holiday with a new tag, and flower, but I decided this guy wants a permanat home. I didn't have a single wreath in my kitchen :insert gasp:!  The tags can be seasonal as well, but 'laugh' pretty much covers so many of my cooking attempts...I knew I could look up and smile at my cooking motto-laugh.  Someday I'm going to start a blog about all my failures, but I'm going to be medicated first. 
Anyway....as for the wreath.  The supplies are a foam wreath, a glue gun, pins, and three strips for 4 inch by 70 inch burlap fabric, and then whatever you want for flower-ee acceories. 
You take one strip and wrap it around the wreath (secure with glue at the start and finish, don't wrap too closely together or it won't make it all the way around).  Take the other two strips, and sew a very loose line up one side of the other two burlap strips.  Pull to ruffle.  Pin it in place (I pinned the two ends together, and then laid it across the wreath in a circular form. 
You glue one to the back on the outer edge, and one on the front at the inner edge.  There should be one portion of the burlap that is finished, and I used this in the exposed inner circle. 
To make a ragged edge, just start pulling the edges of the burlap out until you get a fridge that matches your fringie wishes.  If you are a perfectionist....get over it.  Burlap is completely unforgiving, and part of it's charm is that it is a completely imperfect line of fabric.  Embrass the imperfection....my friends have to...daily. 
OK...and I thought this big no sew flower was so stinking clever!  Taylor came up with this process, and I'm pretty sure I want to open a fabric flower shop. 
All you have to do is cut a piece of fabric....about 20 inches by 8 inches, grab a pipe cleaner.
Throw some lint and misc dog hair on your floor.  This is necessary to the success for your project, just trust me.  If you don't have a dog, you can borrow one of mine for a week or 15.  Let me know. 
Take your glue gun, and run a line down the length of the inside of the fabric about 1/2 inch shy of the halfway mark.  I'm point to the general area you'd run the line (I couldn't photograph the process, glue dries to fast). 
You should have an opening a little wider than your pipe cleaner now.  Run it down the length of your glued fabric. 
Pull both ends together. 
Pull into a circle.  You don't have to finish off the outside edges because they are going to curl under.  Pull it tight and twist it tight.  Ta da. 
My wreath got a red flower.  Once you place this guy on a wreath, or a pin, you can glue it down to the shape you want it.  Case in point. 
Ultimately, I added a button to the center of this one, but that's because I am an unsuccessful member of bottons-on-every-project-anonymous.  They are cute by themselves as well.  This brings me to flower two....burned edge poppies, that tutorial was yesterday, but I can't talk about fire much more this week because there is a physiciatrist somewhere with a clipboard, just waiting to check a few more boxes off before they show up at my door.  I grabbed one more (dotted) flower, already made at Hobby lobby, and some fluffy feather stuff (also from Hobby Lobby).  Add tag...
I then I hung this in my kitchen. 
I'm off to make another wreath...my attic is poorly neglected in the wreath department. 

New Counters/New Backsplash

Friday, January 21, 2011 10 comments

Once upon a 9 years ago, I bought a house.  My goal in life was to never pay apartment rent.  I'd do it different now, but that's how I did it then.  I was new to my career, new to the process of buying homes, and all I knew was all I had to spend was all I had to spend, and home repairs were not in the cards for quite a few years, and considering my career choice (teaching) it would always be a slow process.  I found a house that was bought from someone else prior to my purchase, had been renovated by the buyer, hiked up, and sold to me.  The problem with this thinking was that in the renovations, they actually just covered up a lot of problems, and did a lot of the repairs quickly.  Fast forward 5 years, and the walls came crumbling down.  Year by year, piece by piece....I try to put humpty dumpty back together again.  This year (10 years later)....the counters were in desperate need of repair.  The laminate counters (cringe) were never glued down, so they were always loose, over the years they began shuffling out away from the wall, collapsing to the point that my dish washer didn't open because the counter had collapsed in front of it, and thus, my sanity was in question.  For 2 years I had to wash dishes by :gasp: hands until I was able to get around to this repair.  Since my kitchen is the size of a ship's galley, this is an example of me making a short story long. 
Here are those counters before.  I couldn't stand the laminate, but I actually liked the black/white/gray color (thus, my granite choice looks very similar). 
You know those awful before pictures without make up and stuff?  I've removed all the counter 'stuff', so it looks worse than it did....but still...it was not beautiful. 
I popped off the counters.  They charge 6 bucks a square foot to do this for you, and seemed surprised I was going to do this myself, but hello, it wasn't ever nailed/glued down correctly to begin with, so...hey, there is one plus 10 years later, I was able to rip those puppies off all on my lonesome.  :Insert I Am Woman theme song here.:
Scary.
Down the counters went.  More on this in a minute...and more on 'everything' in another post. 
BUT...there is one thing I did myself (other than pay for someone else to install granite...I picked out the granite if that helps!).  The backsplash was all me...for better or worse.  I decided this was one thing I could do myself.  I did NOT want tile.  I'm so tired of tile....I'm almost as tired of looking at tile as I am of looking at laminate.  I wanted those little metal tins.  I didn't want to nail them up individually, I wanted a 'sheet.'  I found just that at Home Depot. 
It's actually two sheets.  I decided I didn't want a backsplash across the whole kitchen.  My sink is below a window, and I don't do a lot of 'splashing' otherwise, so the stove was the lone victim of my shenanigans. 
This isn't actually tin, so it has to stay 3 inches away from heat....if this becomes a problem, I'll buy the real thing, but I wanted this for cleaning purposes.  Anyway, I glued the two sheets together using my favorite thing (other than sticks, baggies, and jars)....superglue. 

I used this Lock Tite stuff as glue on the back, and slapped it up in the space I measured.  You can cut this puppy with scissors to fit into the space, and you can grab those thin bars to slip on the side to finish off the edge.  I don't know who *you* is...but any of you-s could if *you* to have had it with tile. 

I used some painters tape to hold it up while it dried, and the end result is this...

Before....

After...
Sure, it's just a backsplash, but it belongs to me.  I have a few favorite things that remained once the counters left. I'll share these later with the 'whole' kitchen post....don't blink my kitchens that big.  I think that's enough kitchen for one day!