Category: Fun Mailing Ideas
Showing posts with label Fun Mailing Ideas. Show all posts

Carrot Surprise

Thursday, March 07, 2019 No comments
 I know, I know....Easter is still almost 40 days away, but I always plan early!  This year I made these carrot surprise toys.  Have you seen surprise balls?  Basically, it's crepe paper (sometimes) in the shape of a ball and as you unroll the ball, little prizes fall out.  I've started seeing really cute shapes for the different holidays, and this year I decided I was going to make some carrot shaped surprises for some of my favorite beings under 4 feet to enjoy via the mail.
 I'll start with the end, I filled boxes with crinkle paper and put in surprise carrots for each of the kiddos at the house holds these were being shipped to.  These three carrots are going to my godson and his siblings.
 I tossed in some bunny ears for the little bunny in the bunch.  I'm sealing the boxes and shipping them out as soon as St Patrick's Day has come and gone.
 I bought some fun little toys at Oriental Trading/Party City, along with crepe paper streamers.  I ended up using a full orange on 4 carrots.  For the innards, the different party suppliers usually have free shipping every month or so, so I generally wait until I see that and order some little supplies.
 I started my carrots by wrapping up the pencils with crepe paper.  Once it was covered, I started adding in some of the other goodies (egg shaped cards in this photo).
 I would wrap a few layers, and then add another toy at various points, trying to keep the shape of the carrot in mind.

 I didn't use any glue, I just pressed them down and wrapped....and wrapped....and wrapped.
 I also found some little felt stickers I bought last year at the Target Dollar Spot.
 When I finally had all the prizes in the carrot, I cut some smaller strips of green, pressed them about halfway down the carrot and then just wrapped those in place.
 To 'end' the carrots once you have the shape you like, you can just tuck in the end of the crepe paper, or add a glue dot.
I thought about pressing a little stickers on each to tell them to unwrap the carrot, but I decided on a little card instead since these were being mailed.

Rainbow Seeds by Mail

Wednesday, February 28, 2018 No comments
 I try to send fun things through the mail to my godchildren for all the holidays.  I love that they are old enough to get excited about mail....though it didn't stop me when they were babies.
 Last ST Patrick's Day I sent some rainbow seeds....formerly known as Skittles.  I opened the box, added a fun label, slipped some little cards inside for my godchild and his brothers and then taped it back up.
The fun thing is that for just a few bucks you can mail boxes of candies straight in their original box, which is always a fun surprise.  Sure, it seems silly to mail a dollar box of candy for two or three additional bucks, but.....if you've been to a movie lately, it's practically a bargain on candy.

UnBEARably Easy Valentines Gift

Tuesday, January 23, 2018 34 comments
I found some cute little bear containers at a store called Daiso a few months back (it's a Japanese dollar store-though everything is 1.50).  I bought them and thought it would be a fun mailing vessel for Valentine's Day.  My godchildren and all their siblings live in different states, so I try to make an impresion via the mail since visits are few and far between.  I searched for bear shaped chocolates, but didn't have a lot of success, but I finaly found some individual size gumy bears, Teddy Grahams, and small enough stuffed bears (at the Dollar Tree) to squeeze inside the jars wiht a note (I googled and found fre 'bear' related tags to print).  I'm going to put the address on the lid and the mailing label on the backside.  You'd be surpised what you can send through the mail!  Well, unless you deliver mail to my godchildren, then you know all sorts of strange things can be shipped via the mail.  For more mailing ideas, hit this link. 

12 Day of Christmas

Wednesday, November 22, 2017 No comments
 I did this once before for my cousin's daughter, and it was a big hit.  I bought a bunch of little crafts at craft stores in the area and I wrapped them each individually (12 crafts to be exact).  I added a tag with a number and the date to each tag (because my goddaughter, who is getting these gift, does not like to wait).  This way she can look forward to opening a gift each day, and she will soon learn they come with a little something for her to do each day. 
Her house should be well decorated by day 12! 

Mail a Pumpkin

Wednesday, October 11, 2017 1 comment
I'm always trying to find fun ways to send things through the mail. This Halloween I'm sending some treats in these little pumpkin cans.  
 I used a pull tab can of soup that I opened with one of the openers that removes the lid without leaving a sharp edge.  I then sprayed the can orange.
I filled the can with little treats I found at the dollar spot and Party City favor bins.
I added some confetti from Hobby Lobby to fill the extra space.

 I took a glue gun to reattached the lid so it can be 'popped open.'  Since this is going through the mail I'm also taping it.
I colored on a face with a black paint pen and added labels and mailing labels to the can and then sent it on it's way.
 You'd be surprised by what you can ship through the mail-no brown envelope required.

Birthday Party in a Box

Monday, April 17, 2017 No comments
My friend, Regan, lives up in Seattle....really really far from family and friends.  Her husband is in the military and this is where Uncle Sam wants him for the time being.  It's a fun place to visit for the rest of us, but....I know birthdays aren't as fun without friends around, so I decided to send her a birthday party in the mail.  A friend did something like this for me once in college and it was the cutest.  I bought a banner, confetti, plates, napkins, and a made a pinata where I put her gift inside.  Here is that tutorial. Unicorns are our joke.   No doubt, birthdays are better when served up on a princess plate.


Pocket Letter

Friday, June 24, 2016 No comments
You Tube sucked me in, and I discovered something called a 'pocket letter.'  Maybe I'm late to the game, but....how fun?  This is a beginners pocket guide.  I put this together quickly for my goddaughter before I was heading out of town, so I'm looking forward to digging into this in more depth soon.  The point is to share some of your fun supplies with others.
Basically, you use baseball card pocket pages, you fill each one with some little cute paper/design and then add some supplies for the receiver to use to create their own project.  In this case, I just added my supplies to the front, but you can slip them in the back.  I've also seen them where people decorate the sides/holes etc.  It folds into thirds and fits perfectly into a letter size envelope.  I'm going to definitely hit up some scrapbook supply stores and try to find some fun ones for the different holidays and include some little flat erasers/candies/gift cards/ribbon etc in the future.  I 'sealed' the top with a little slice of washi as well
This time around I included some cute paper clips, puffy puppy stickers, gems, sequins, and washi (wrapped around some plastic)

.  My goddaughter is the age where when I send her a card she pulls it all apart anyway to play with the gummy pieces etc, so....what better thing than something that's made for that purpose.  I also printed off some thumbnail size pictures (tutorial here) from my recent trip to see her, and I figured she can make her own collage of our time together.  Or not.  Regardless, I think I've met her little interest level now-unicorns, fairies, bright colors, and bling.

Pet Unicorn

Friday, March 11, 2016 No comments
 One of my friends and I spend a lot of time talking about unicorns.  It's a joke...sort of.  With that in mind, I like to randomly send stuff through the mail just as a surprise.  I love packages, and so a surprise package would be the ultimate gift for me, so....I give what I want to get.  I have these little duck unicorns I bought from Oriental Trading awhile back.  I also had these little white boxes I was going to use to mail shower invites, but time wasn't my friend, so....they are sitting in my house waiting for a purpose.
 I put the unicorn's care instructions inside the box.  It turns out unicorns sometimes needs additional horns (sold at Party City), they eat skittles (ironically, a well loved treat my friend and I share).  They need to be told fairy tales at bedtime, and they like to listen to music in the morning-in particular, 90's boy bands.
I put all the essential pieces for caring for a unicorn and sent it on it's way because-who doesn't want to received a magic pet unicorn through the mail?

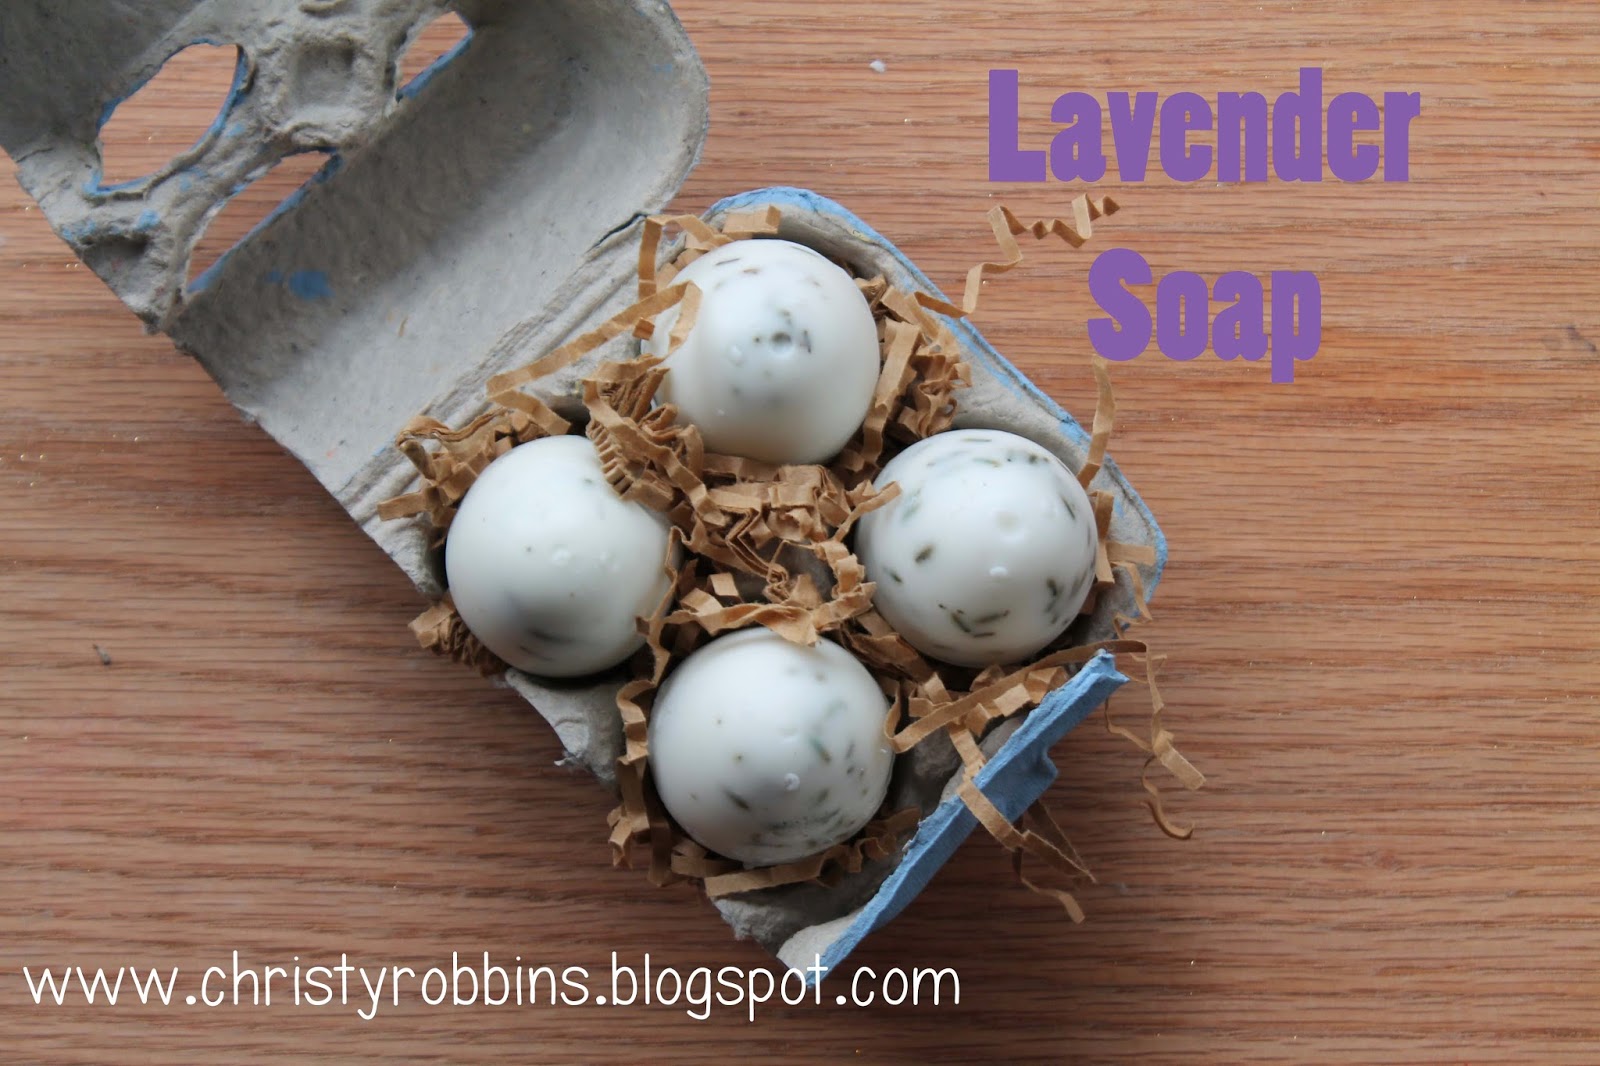
Lavender Egg Soap

Friday, March 04, 2016 No comments
 I made these soaps last year.
 I started by taking an egg carton and painting it a pale blue.  I don't know why this is an important thing to share, but really, it's all about the delivery in my book!
 I used some soap squares, dried lavender, and I even added some lavender oil to make the scent a little stronger just because.  I used Easter eggs for my mold.
 If your eggs have holes, you might want to cover those up with a little duck tape so it doesn't leak out.
 Melt your soap, add your dried lavender and a drop of oil.  I filled one side of the egg, let it harden.  I filled the second side and then close it, making sure the liquid was on top so that it would adhere to the dried side.
 Once both sides are dried, you pull off the egg.  Everyone once in awhile, the two sides would separate.  I took just a little bit of melted soap and place it in the middle and they dried together again.
 I placed my soaps in my painted egg carton.
 Last year, my resolution was to send something through the mail each month-cards or gifts just because. The rule was it couldn't be for a birthday etc.  So, this little package went to a friend up in New York who is a fan of floral.  I added a little purple candle holder and tea lights and a little chocolate bunny to the package and shipped it on it's way.

Valentine's Cake Balls

Friday, January 29, 2016 No comments
 Last year I made these little boxes of treats for friends local and far away.
 I made red velvet cake balls using this recipe.  I bagged up the cake balls I was mailing in little cellophane bags.  I put the heart box into little square boxes with the cards that I wanted to mail.
 I made these little cards to go with each one.
 I printed a little message on the inside of my cards using this tutorial.
 I found these little paper mache heart boxes and I covered the tops and sides with scrapbook paper.  I added ribbon to the boxes I was passing out here and tied the tags to the top of those.
I was really digging the red and brown last year.