DIY Decorative Cross

Tuesday, July 31, 2012 6 comments
 Every year I choose a gift to make and personalize for friends.  I made aprons for all my friends one years, bags, then jewelry, and now.....crosses.  Not everyone is going to get a cross, but....everyone that will appreciate a cross will get one.  I've seen wooden/decorative crosses in stores and boutiques everywhere.  It's so much more than a symbol in my life, in fact, it gives my life meaning, and I've truly been blessed to be filled with friends and family that also understand the story behind the symbol.  A life changing story.  I decided what better gift than crosses that represent pieces of my friends in the colors I choose. 
This first  cross is for me.  I had a spot I recently pulled a picture down from and it fits perfectly.  I found different sized wooden crosses at a local antique store.  One of the vendors sells unfinished wood.  They also sell different size crosses at different craft stores, my suggestion would be to take along a coupon.  I have about 2,345 different ways I plan on creating decorative crosses, but.....this is the one 'for me.'  I grabbed two pieces of scrapbook paper that go together pretty well.
 I painted the sides of each cross with acryllic paint, then traced around the paper using the cross, cut and used modge podge to glue it down.  I used a second layer on top.  This gives it a glossy texture, and the thinner the paper, the more you have to really press out bubbles that want to form.  Glue sticks would work as well, but....I needed a little gloss in my life. 
 I nailed the little cross to the big one (just one nail b/c my next step also holds the two crosses together).  I added the second sheet of paper over the nail. 
I bought a decorative knob at the craft store that sort of correlates.  I drilled a hole through both crosses and twisted it down.
 Last up...a little hanger on the back. 
I'm not working on a few more for friends for upcoming birthdays with a little twist on a few.  A really simple project, and hopefully a meaningful piece to the home.

Sewing Pattern Flowers

Monday, July 30, 2012 1 comment
 I saw the idea for making flowers out of old pattern tissue at country living.  I'm am slightly, like, 12 steps away from a healthy obsession with projects out of old patterns.  I'd say it was because I grew up with a Mom that used to sew, but thinking back, this also entailed me sitting at her machine at one point of my life and actually sewing a needle through a finger....completely, and having to figure out which way the wheel turned to get it out.  Good news, I got it out....and then started screaming bloody murder.  Wait, I guess all my projects do include destroying patterns, which equals no sewing, which equals elimination future opportunities to add additional scars to my fingers, which is probably why I like them so much.  For these little flowers.....old patterns...
 I cut these down to roughly 11x8.  I accordion folded two together (more paper=puffier flowers). 
 I cut the ends in a slight arch.
 Squeezed the middle together and tied around a pipe cleaner for the stem.
 A couple flowers, and an old tin (another obsession for another post) and.....tissue flowers.  I don't like silk flowers, but dried flowers...and now, apparently, pattern flowers, I can learn to love.

Recycled Record Book Ends

Saturday, July 28, 2012 1 comment
 This is one of those projects that has literally been sitting around for six months, which is ridiculous because I spent more time moving the pieces around than it took to do the entire 'project.'   It's not even much of a 'project.'  I just spent so long not doing it, when I finally did it...I needed to blog about it!   I'm slowly redoing the decorations in my living room, trying to make it more 'me.'  I have a hodge podge of books that I've collected in my travels....sometimes I pick up coffee table books, sometimes cookbooks, always an ornament.....so I wanted to put a few of them up on the mantel in my living room, and I needed a little something to hold them in place.  A book end.  Duh.  I've been really into records for some reason and been crafting with old records I've found in antique stores.  I bought this little doozy-Olivia Newton Johns' Let's Get Physical (a work 'funny').  I used super glue to attach it to the book end. 
And now...a little bit of a conversation piece to hold those books in place.  So simple, and kind of fun.  I spent my childhood listening to my Mom's record collection in our den.....records always make me smile, might as well throw a few things worth smiling over in my living room. 

Frames Quote Board Center

Friday, July 27, 2012 No comments

I've always wanted to make a message center out of misc frames.  I've seen these out and about.  The problem is....I've run out of room in my house to keep clothes, my purse, or dust bunnies, I certainly don't have enough wall space for a framed message center.....enter classroom ideas.  As I started thinking 'next school year' and wrapping up the year, I covered one board in black fabric.  I bought misc frames at the thrift store (usually sold cheaper without the glass)....and I sprayed them all gold.  I guess I needed a little dazzle in my life.
I covered up some clips with pieces of scrapbook paper to be able to quickly change out student work/quotes, or whatever makes it way on the message board. 
 Ideally, I could hang these up by a nail, but the cork is just a thin layer of concrete, so I used the sticky hooks, and I just stapled the excess 'sticking part.  I'll cover these up with something creative....or not, but....I'm liking it.

Mini Coaster Albums

Thursday, July 26, 2012 1 comment
 Not to be a broken record but.....I love coaster books.  I discovered this idea a few years ago while watching a tv show.  Basically, snag some unused coasters at any restaurant and use these to glue down photos.  Punch a hole in a corner, add a ring, ribbon and charms....because life is better with a little bedazzling.  This year I made a bunch of these little books for friends I got to travel with along the Amazon river.  The concept and design is the same, but the photos inside are personalized to each person.  I take a ton of photos, and this gives me an excuse for doing so...see, I can use those photos to make little gifts. 
I stole the package idea (zebra and lime green....yummy) from one of my favorite boutiques.... I buy things at the store just so they will gift wrap it, so I decided to try my hand at it....it's all about the packaging.  I've  loved animal print packaging for the last little bit of my life.  And....by 'little' bit I mean, my whole life.  I just think I need to excuse all the animal print present in these projects.

Brigadeiros (Brazillian Chocolate Truffles)

Wednesday, July 25, 2012 2 comments
 My chocolates didn't win any beauty contest, but one of my favorite foods I 'met' in Brazil when I went last year on a mission trip were the chocolate truffles.  I thought about them all year, and I can't say that's why I went back this year, but....it didn't hurt (more to come on this latest adventure on Monday).  Before heading to Brazil I was invited to a pinterest party, and we were all asked to bring a recipe we had been wanting to try....these were pinned via about.com.  So....that seemed like enough of an excuse for me.  They are super easy to put together and only require a few ingredients.  A little more patiences and these will hold up like round truffles as opposed to mine which were a little soft and conformed to the mini cupcake liners instead.  Oh well. 
So....if you want to try a little piece of Brazil here is the recipe for Brigadeiros.  And for a hot country, they sure know a thing or ten about chocolate.....I just want to know how to store hershey bars on the boat without them becoming s'mores by the time I attempt to open them, but.....that's another story....
Ingredients:  14 oz can of sweetened condensed milk, 4 T. cocoa powder, 1/4 t. kosher salt, 3 T butter, 1 t. vanilla, chocolate sprinkles. 
Instructions:  Pour the milk into a 2 quart sauce pan.  Still in the cocoa powder and salt.  Cook, stir continuously over low heat.  The mixture should be barely at a boil (I didn't get mine hot enough at first, but don't let it get so hot that it burns or gets sticky).  After about 10-15 minutes of stirring it should become thick and shiny and start to pull away from the bottom and the sides of the pan.  Remmover it from the heat and stir in butter and vanilla until it's combined.  Chill in the fridge for an hour.  Butter your hands (I just ended up scooping it up with a spoon and plopping it into the sprinkles.  Roll in sprinkles.  Place in paper liners.  Keep chilled.  You can make these several days ahead of time. 

Crockpot BBQ Chicken

Tuesday, July 24, 2012 2 comments
 Oh my.....this was de-li-cious.  I love the crockpot in the summer when I'll do anything and everything to prevent having to turn on the oven, and ultimately heat up the house.  It gets so hot that cooking on the side walk becomes a very real possibility....so any crockpot recipe is a friend of mine.  I googled this guy and found it via Fork In It, and I'm keeping it....and using it again....maybe tomorrow. 
Crockpot BBQ Chicken
Ingredients:
4-6 pieces boneless chicken (you can throw it in frozen), 1 bottle of BBQ sauce, 1/4 c. vinegar, 1 t. red pepper flakes, 1/4 c. brown sugar, 1 t. garlic powder. 
Instructions:  Pour over the chicken and cook on low for 4-6 hours. 
*I put this together the night before and put the bowl in the fridge overnight.  I do this a lot, and then toss it on to start heating when I leave for whatever I'm doing that day. 

Micah's First Birthday Cupcake Shirt

Monday, July 23, 2012 1 comment
 For the last few years I've been making cupcake dresses and jumpers for my friend's kiddo's first birthdays, but it's impossible to judge how big or little they will be.  So, it was time to start thinking 'year one' for my goddaughter, Micah....with only 6 months to spare.  Whew.  She's off the chart (and has been) since she entered this world as far as height, so I decided to make a tshirt and add a tutu later to complete the outfit. 
 I used steam a seam, which I blogged about a week ago with a watermelon onsie to hold down the cupcake 'liner', candle (a strip of ribbon) and flame (all scrap fabrics). 
 For the icing I used some rose ribbon I bought at the scrapbook store, and I just stitched it down with some little x shaped stitches...you could use fabric glue, but.....I was feeling domestic. 
In the past, I've had these monogrammed, but the fluffy icing seemed a little bit overkill.  I found this little iron on patch to put on the cupcake liner.  And now....I'm working on the appropriate hair accessory for my favorite bow head. 

Whoopie Pies

Saturday, July 21, 2012 1 comment
 I had a whoopie pie for the first time in Maine...I read it was something I was supposed to try.  I wasn't impressed.  Granted, I only tried one from some random store.  I knew it was a fluke.  It had to be.  Chocolate?  Cream?  That's practically a blessing from God.  I came home and I googled a recipe and I was right, it was a fluke.  Add whoopie pie to the list of things I love.  This recipe was so good....I can't even speak of it.  OK....maybe once, but then I'm going to knock my head against a wall until a forget because I can't have this sort of temptation in my life.  I want to eat them all. 
I googled recipes and found several recipes from allrecipes I put together.  For the cake....
Mix up a Devil's Food cake mix with all the ingredients it calls for EXCEPT, cut the water down to 3/4 c. (so, mine called for 1 1/2 c. water and I only used 3/4, plus I added the 3 eggs and 1/2 c. oil the recipe called for....this makes it thick enough it won't spread as it bakes and will be more like a cookie).  I also added 3 T. of flour, and a box of chocolate instant pudding (the small box).  I mixed these up and then I dropped them onto cookie sheets.  I made mine about the size of golf balls and it made 16 cookie sandwiches (32 cookies). 
Here the dough is wet.
 I baked these at 350 for 10 minutes.  If you make bigger cookies (these are usually larger according to the cookies I observed in Maine, so add an additional minute or two....they shouldn't look 'wet' in the middle when they are finished). 
 For the filled I mixed....
 1 T. of milk, a 7 oz tub of marshmallow fluff, 1/2 c. shortening, 1 t. vanilla, 1 1/4 c. powdered sugar.  I put it in a ziplock, snipped off the edge and filled the backside of a cookie. 
 Stack one on top for a pie.  I think the more filling.  The better.  The filling was de-licious.
Wrap each of these up in cellophane and store them in the fridge.  Now...I'm off to knock my head on that wall until this falls out of my memory.....it's that or take up ultra marathons.  I.  Love.  Whoopie.  Pies.

Make Your Own Super Hero Cape

Friday, July 20, 2012 1 comment
After being gone most of the month of June I'm frantically trying to catch up on....well, fine, my Christmas gifts. Preparing to type that sentence I realize it may not be universally understood, but in my world....I'm behind....very far behind!  I also have a collage of birthdays that happen in the fall/winter so I'm trying to be creative.  I'll hold off on some of the projects I've been working on for friends who can A)  Read B)  Access the Internet.  Those under 4 years of age are fair game to have their gifts posted in advance.  This is a work in progress, but I'm making super hero kits for some kiddos in my life.  I decided I wanted a DIY element so even though these would have been much cuter in a solid super hero appropriate color, I decided to go with a white cape so it can be colored with washable markers by the recipient.  As far as the actual cape, it literally took about 10 minutes, in between a 13 hour Jane Austen movie-a-thon.  It's summer.  I'm single.  I can do this sort of thing.   When I wasn't gazing at Mr. Darcy, I just trimmed the edges, you could also leave them raw, or use fabric glue to create an edge if you don't heart sewing machines.  I used this super simple process for attaching a D (the first letter of his name), so simple.  You can outline the letter with nothing or jazz it up to your hearts content.  I used some scrap fabric and double bond material (in the link above) and it all just irons on and sticks.  If any of the edges begin to lift up, just iron it down again.  You could also finish it off with puff paint, or, in this case, I used a yellow stitch then added some ribbon to tie it all on for super hero activities.  I'll add some fun books and other super hero appropriate items to this gift, but I love that it fits in the little container (an old crystal light container).  How easy and fun would these be to make for birthday party activities?  No age limit. 

33 years of....

Thursday, July 19, 2012 3 comments


The thing about a birthday is that it gives you a chance to stop and segment a portion of your life.  Reflect.  Revisit.  Beat your head against a wall.  Rehash.  Reminisce.  An individual New Year's Celebration. That’s all assuming you taking the time.  Assuming you still can remember a year….I can.  Mostly.  I was doing all the things above as I celebrated 33 yesterday.  I can’t remember the details of last year, but I remember the basic facts.  You know that feeling at the end of the roller coaster where you know you’ve just been through a lot, yet here you are pulling into the same station you left just awhile ago.? Safe.  Maybe ready to move on to the next ride.  Maybe ready to get back in line for that ride….just one more time.  There were big highs, scary drops, jerky turns, slices of calm, bumpy paths.  Here I am again.  Same station….sort of.  I feel like this is where I was last year, content with where I am, but ready for the next adventure.  Sort of.  Yet so much has happened.  So much has changed.  This may look very familiar physically, but I know emotionally I’ve arrived at a much different place this year.  I met people I’ll never forget.  People I get to  start this new birth year with.  I’ve met people I may never see again this year, but they have also shaped me for the better.  I ran.  That in itself was something new.  I ran a half marathon.  That in itself was a miracle.  I’m 4 clothing sizes smaller.  I chased a couple more gray hairs with my tweezers.  As if that works.  I said goodbye to one of my happiest pieces of the prior ten years, my dog Max.  I said hello to a precious Goddaughter, new family, and new job opportunities.  I said goodbye to a few hopes I had carried with me, but time and situations didn’t line up, and the pieces of those puzzles will have to wait until eternity.  I crossed off my 50th state.  I started my 11th year as a teacher.  I visited Brazil.  Twice.  I’ve started some new projects, ‘big’,projects I hope to be reflecting on in a year.  I’ve read.  I’ve written.  I’ve called friends.  I’ve flown so many times I no longer have it in me to feel anxious about flying.   Mostly.   I ate a lot of candy.  I had a cavity. Maybe two?   I watched Pride and Prejudice approximately 345,256,876 times .  This week.  I prayed a lot.  I cried a lot.  I cried about the answer to some prayers.  I sat in awe at the answer to prayers.  It was a year filled with family, and friends, first, and never agains.   In the end, no matter the ride, looking back-what a great year of growth.  Not all the growth spurts were easy, but I’m better for each one, and more ready to tackle year 33 than I would have been a year ago.  With all this prep work, I can’t wait to see what adventures await!  Where will this ride go?  I spent the day with family.  My Mom and I headed across the border....of Dallas, to Fort Worth.  I wanted a local adventure, so we explored some of the sites and stops. 
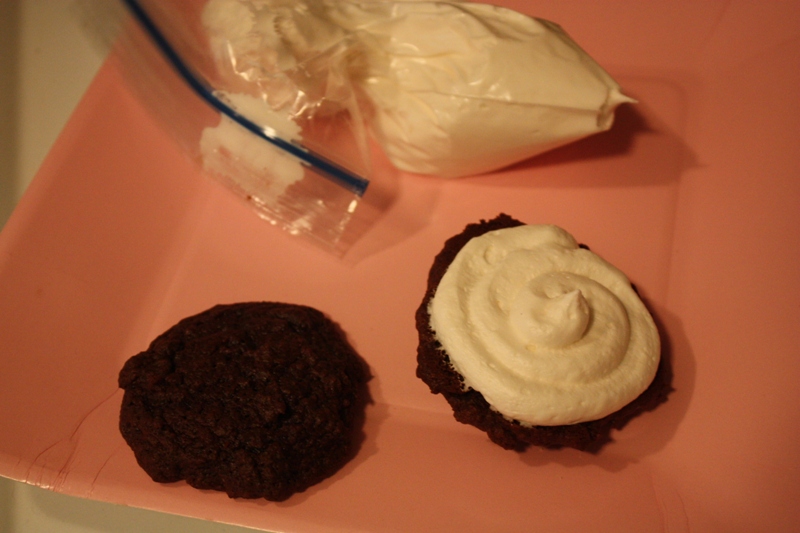
I spent the evening celebrating with extended family amongst phone calls and deliveries from friends, cake from Steins.  Above all, I know how blessed I am on my birthday and each day in between.  I feel spoiled by God, and I love every pictures and place He's brought me too, and the beauty and blessings He continues to write into my life. 
It was a great first day for a new year.