Category: Candy
Showing posts with label Candy. Show all posts

Butterfinger Bars...or....What To Do With That Extra Halloween Candy

Friday, October 31, 2014 1 comment
 I don't have any kids to collect candy....though my friends understand that they are to collect and redistribute any boxes of Dots to me on the day after Halloween.  BUT....I do have a ton of trick or treaters that swing by my house on Halloween.  And...you know what happens if you run out of candy?  Tricks!  So....I buy a lot of candy....which means that if I don't meet my Halloween trick or treater quota...I have a lot of candy.  I've found if I can disguise it in a more 'elegant' dessert form I can usually foist it off on people at work So I give to you-the Butterfinger Bar...so good that I can assure you....that bag of butter fingers will be used only in the case of emergency b/c I want to make this puppy when the evening festivities are over!
I found the recipe here, and I changed it a bit to suit my fun size bars of candy.
Butterfinger Bars
Ingredients:  16.5 oz pkg of refridgerated sugar cookie dough at room temperature and broken into pieces, 8 fun size hershey bars coursely chopped, 20 butterfinger fun size bars (or 7 whole bars)-this is basically one pkg of the pass out candy, with two to eat while you make your dessert.  
Instructions:  Heat oven to 350.  Grease a 8x8 pan.
Mix the cookie dough and Hershey pieces.  Press half of your mix into the bottom of the pan. Reserve 3 fun size bars (or 1 full size bar).  Line up the rest of your butter finger bars across the dough.  Top with the remainder of your batter.  It won't totally cover your bars, that's fine.  Crush the remaining three fun size bars and set aside.  Bake your dessert for about 20 minutes (until dough is cooked).  Remove and top with the crushed bars.  Let it cool COMPLETELY.  Slice and serve.

Chocolate Dipped Candy Canes

Tuesday, November 20, 2012 No comments
 I shared my not so secret homemade hot chocolate recipe yesterday.  I made jars of this stuff last year for friends.  I also bought design-a-mugs for my friends to let their kiddos decorate, and I made some chocolate dipped candy canes to add for stirrers.  I mean, the best accessory for chocolate it more chocolate....right?  The most complicated part of this whole process was taking the pictures.  I just grabbed some candy candes, chooclate morsels (I just happened to have some that were mint flavored left over from a week's worth of peppermint projects I blogged about here), and sprinkles....because sprinkles are to food like glitter is to crafts....magic. 
After de-cellophaning the canes, I melted the chocolate for about a minute (no more) at two 30 second intervals-stir-melt, and then dip. 
I
Plop it onto wax paper, and add sprinkles, or you could get really fancy and melt a second color of chocolate and drizzle lines. 
 I stuck with sprinkles b/c.....I have enough to get Texas through the next ice age. 
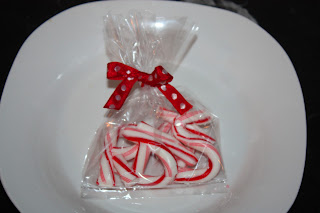
 Let it dry, bag 'em, bow 'em.  Add to the hot chocolate and mugs and call it a day. 

Peppermint: Reshaping Candy Canes

Monday, December 05, 2011 8 comments
A few Valentine's Day ago I saw a tutorial on every other blog about turning candy canes into hearts for Valentines, and even some people that wrote 'love' through melting and reshaping.  I decided to try it out over Christmas for a few friends that are not included in the 'chocolate fixes everything' club of gift giving.  These would also be cute present toppers. 
Basically, line a baking sheet with parchment paper or silplat, place candy canes on top, and put it in a low oven (I did 300 degrees for about 6-7 minutes).  Pull it out, and the candycane should be easy to reshape.  If it cools before you are done, put it back in and heat it up again.  I did go ahead and break up some of the pieces prior to baking b/c when it's hot, it is stretch, and this helped it keep more of it's shape (like with the A).  Prese it together, and it should cool as one piece.