Category: Spring
Showing posts with label Spring. Show all posts

Spring Wreath

Monday, April 09, 2018 No comments


I took this wreath recently to Good Morning, Texas.  It's currently my spring wreath, which replaced a wreath similar to this I made years ago with REAL eggs I blew out and cleaned.  They were beautiful, but they broke often.
A few years ago I discovered 'fake' hard boiled egg that you can get at Walmart, most craft stores, or (in my case) the 99 Cent Store.
I spray painted 3 1/2 dozen blue and flicked them with brown paint to look like Robin Eggs.  
I also grabbed some moss at the dollar store and I hot glued the moss and the eggs to a grapevine wreath and then added a bow.  Easy, and very cheap!

Let's Go Fly a Kite

Monday, April 13, 2015 No comments
 On Good Morning, Texas I'll be sharing a 'how to' on kites.  I'll post the video later on facebook.   My goal was to use the cheapest supplies I could find.  You could use a garbage bag or butcher paper to put together these kites, but I splurged and bought a table cloth for a dollar....which makes 6+ kites.
 I glued together two sticks together.  I found some thin sticks for less than a buck at the craft store.
 The glue was just to hold them in place.  I went back over the center with some string to hold it tightly.
I then took the same string and wrapped it around each arm.  I taped it to the sticks to hold it's shape.  
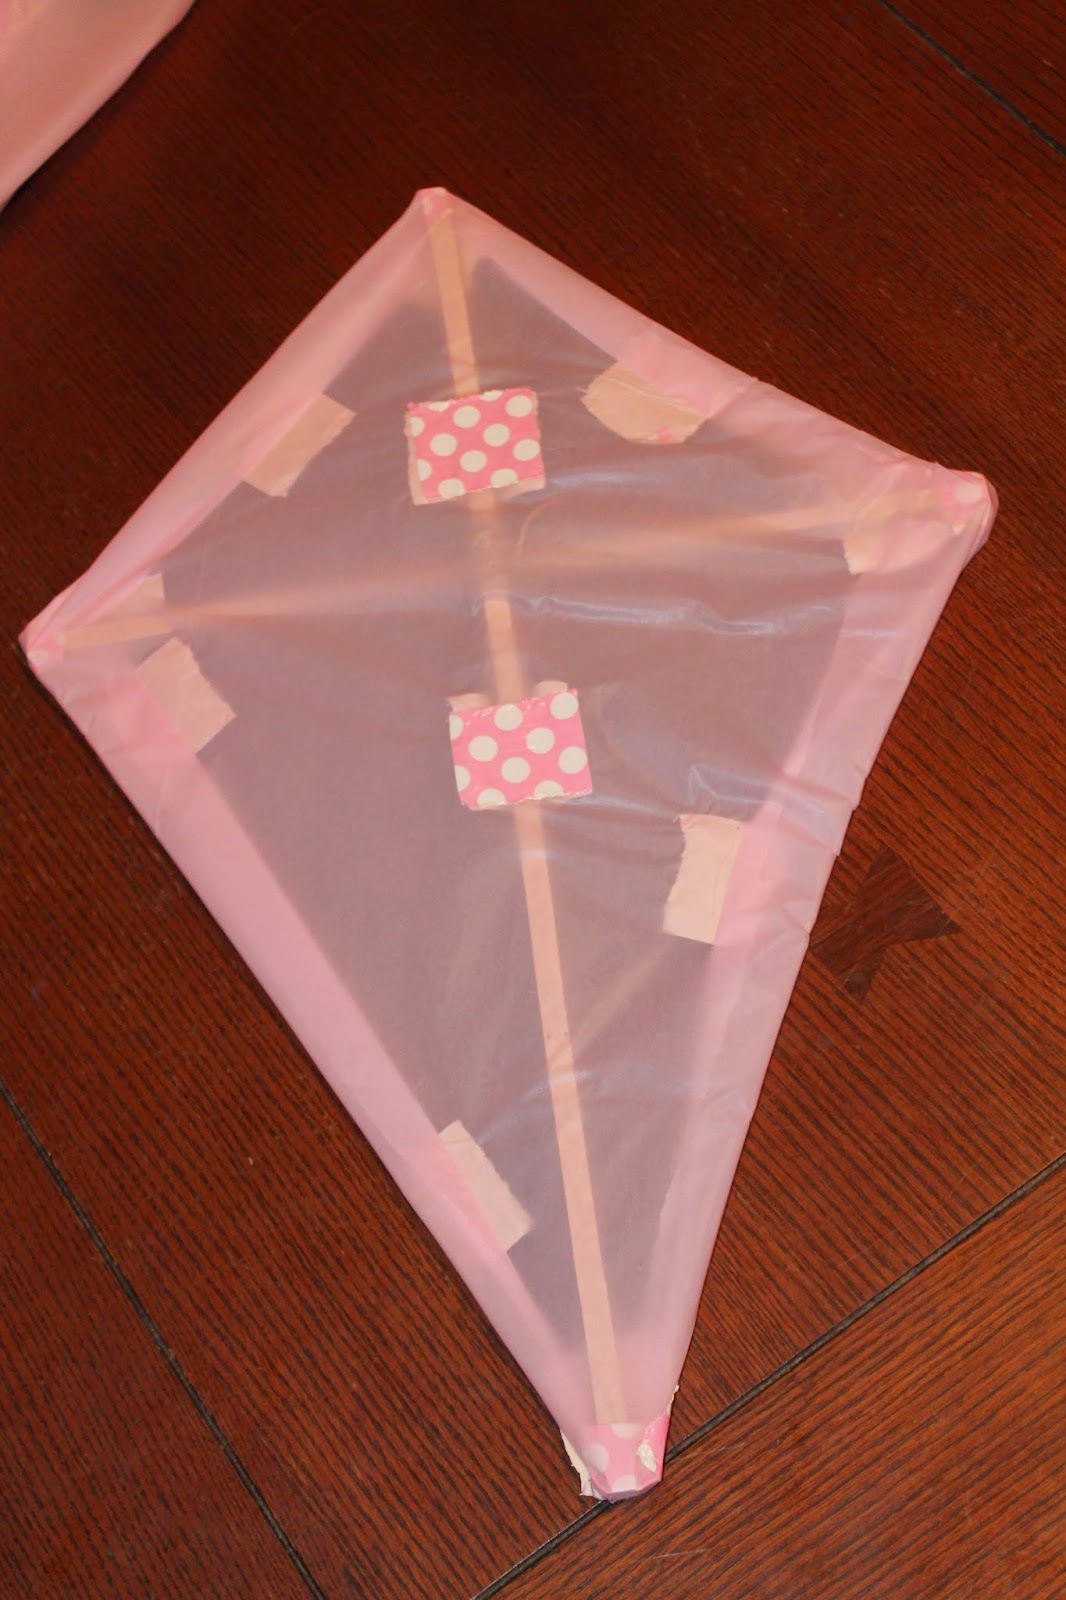
I measured out the plastic tablecloth so it was about 11/2 inch extra around each side.  
 I taped it down. I also added two piece of tape in the middle on the back...
...and front.  
I punched a hole and strung another string through this, tied it off, leaving it a little loose.  This is what I attached the kite string too.  
I added a string with a tail.  I used some ribbon.  This helps weight down the bottom so that it's heavier on the bottom and can catch some wind.  
 I also made some mini kites that I dangled from dowel rods and covered in some vintage looking fabric.

Painted Silverware

Tuesday, March 10, 2015 No comments
 I'm working on some 'pop of color' projects for spring.  Next up on my list are these little silverware samples.  You could do the whole handle, but I liked the 'half dipped' handle thing going on here.
It doesn't get much easier as far as projects go.  I bought some mini bottles of paint to accompany some blue I already had and I taped off the end of some silverware I bought at the Dollartree.  I chose some different handle patterns.  They sell them two for a dollar there, but I also saw some in little bundles for about the same price at Walmart, and I know you can dig through a hodge podge of funky silverware at most thrift stores.  After you spray it down, go back over with a clear sealant to make sure it doesn't chip and scratch between uses.

Bird House Ideas

Wednesday, April 09, 2014 No comments
 Today I'm bringing bird houses to Good Morning, Texas.  They asked-I got to work.  First up is the one above using a preformed bird house I attached wine corks too.  A bird bar.  Here is the full tutorial for that.  I don't drink, I'm not a fan, but....I am fascinated by wine corks-I bought these on etsy.  
 I do love a good recycled project, in this case-I found a pink pan at the thrift store for a few bucks and put this little gal together.  Here is that tutorial.
Last up, a true recycled project-I took a coke bottle and painted it.  I just used acrylic paint on the outside (so none would chip off an affect any next that were built here).  You could use the full bottled, but I cut mine down into two pieces.  I sprayed it with some water resistant spray.  I used and blade to cut out the hole.  The size of your hole determines the size of your bird family.  I also read to place brighter houses near gardens, and more natural colors if they are just in a tree so you don't advertise to the enemy (aka, the cat) where they can find a tasty snack.  How high you hang your house also matters.  Here's a link on about.com I found.  The full step by step video should be posted on my facebook page later.

Repurposed Pan = New Bird House

Monday, April 07, 2014 No comments
 I saw the idea for using an old pot to make a bird house a few years ago and it stuck with me.  I changed up some of the technique, but my inspiration lives at tatortot.  My first step was to find an old pan.  You can find one you want to paint, but I stumbled across this pink one.  Score.
 I also bought a thin sheet of wood, you could also use foam board, just clean out any test at the end of the nesting season when the family moves out and replace it.  I figure if those foam boards work for election signs out in the season, they should work for this as well.
I used a jigsaw to cut out the circle I traced around the lid of the pot.
I drilled a hole in the middle.
 I took the same saw and drilled a hole in the middle.  The bigger the hole, the bigger the bird or animal that can fit inside, so...if you want cute little song birds, make 'em small.
Now for decorating.  I read up a bit on this:  you want your house to blend in with it's surrounding so you aren't advertising to the enemy (cats) where their dessert lives.  This little guy is going near a garden, so pink should be fine.  You could paint your wood, use scrapbook paper, and lots of water resistant spray, but I found some duct tape that worked.  I'll still probably replace it after a summer outside, but....it should hold pretty well in the weather.  
 I drilled another hole for my little perch.  I found this knob for half off at Hobby Lobby.
 You could use a foil pan, or I found this weird piece of metal in the plumbing section at Home Depot.
 I cut a piece and nailed it down with thumbtacks to help protect the bird family from some rain.
I drilled a hole in both sides of the board and in the pan and I tied it on with ribbon.  I added a dab of glue before hanging so it would hold firm until I was ready to clean it out and refresh the home.
Now.....time to advertise my vacancy!

Bird House Memories

Thursday, April 03, 2014 No comments
 I made this bird house to go along with a bird house themed collection of crafts (more to come on that).  I saw a picture via google, with no link back, so...if it's your idea...whoever you are,let me know.  It wasn't mine, but I liked the idea.  First, I guess a disclaimer, I'm not a drinker of wine or anything else of the alcoholic sort....I don't enjoy the taste, more for you.  I DO like corks are fascinating, and I have a ton of friends that collect them.  I've been given a few collections to find a craft home for...so...
 You can find these unfinished bird houses at any craft store.  They come in all shapes and sizes.  If you don't have a bunch of wino friends, or don't have your own cork collection-you can buy them online.
I took a knife and sawed my corks in half.  You probably don't want to eat steak at my house-my knives are all dull because of decisions like this...
 I hot glued them to the bird house.  If you are going to leave this out in the weather, you might use a gorilla glue or something different so the summer heat or winter chill doesn't pop that glue off....if it's an inside decoration....glue guns should work fine.   You also might want to spray it down with some weather proof spray paint (again-found at the craft store).   I sawed around the edges and holes, super easy, and a fun/different way to store some of those memories.  

Burlap Initial Wreath

Friday, May 10, 2013 No comments
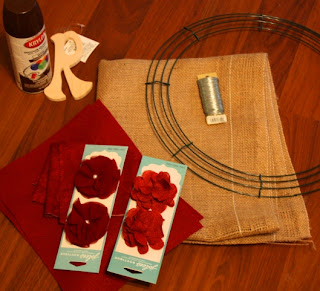
 I made this for my pal Sarah's new house.  She said for house warming gifts she wanted things with initials on them.  On the side she told me she had a big glass window and wanted something to cover up the gap so peeping salesmen couldn't see in without a struggle.  So....say hello to the wreath for 'the other seasons.'  I went with brown and burgundy per my instructions.  I've made a lot of wreaths.  I've used a lot of burlap making wreaths but I'd never made one of these bubble wreath's before.  I know you can do it with a coat hanger, but I went ahead and bought a frame at a craft store along with a yard and half of burlap (they sell ribbon you can use with finished edges, but it's cheaper to buy it by the yard).  The only other thing to make the bubble wreath needed is some wire.  I snagged an R and some pray and some other materials for flowers...
I sprayed the R with brown spray paint and then rubbed the edges and top with sand paper to make it look a little worn...just a personal preference....I like to make new things look old so I don't feel so lonely in this world.  
 ...random picture I took during the creative process because she is so helpful.
I cut the burlap into 6 inch strips, then thread 8 inches of wire through the burlap (weaving back and forth)....
I tied it to the wire wreath and then pinch the other side and tied it to the wreath as well making a 'bubble'.  
 See....
 I went back and forth across the 4 wires to create a bunch of little loops in all directions.  Here is the back....
Halfway there.  I later went and filled in any gaps with random loops.  I just kept adding when I ran out of my strips until the whole thing was covered.  

I'm traditionally the fan of a bow, but I found this wreath sort of makes it's own fluffy statement....so I bought a few burgundy flowers, then made a few out of felt and fabric.  
 To make the rolled flower I tied one end of a 1 inch wide strip I cut down the length of the fabric....
 Then I twisted, rolled, and glued.
 I glued the initial and flowers to the wreath....
The top two flowers.  
 You could add pins to the back of the flowers and change them up for each holiday with the burlap as the backdrop....but I think I'll just leave this here.