Category: Cookie Exchange
Showing posts with label Cookie Exchange. Show all posts

Muddy Buddy Truffles

Tuesday, December 07, 2021 7 comments


Every year for at least 15 years I've hosted a cookie RECIPE exchange at my work.  I've talked about it in the past, but the gist is that you bring two cookies and a recipe attached for each person.  We've had 25 people and 10 people.  You never know how wants to bake, and what they want to bake.  I always find a few new recipes this way regardless of the number, and this year was no exception, including the one I brought.  
These muddy buddy truffles taste exactly like you would expect them too.  The crunch of the chex and the pb, powdered sugar, and chocolate give them the delicious taste of a muddy buddy, but I thought they were easier to make (I can never shake my muddy buddies evenly).
The original recipe says they make 12, but I got more like 18 out of a batch.  It also said to wait for the chocolate to dry before rolling them in powdered sugar (double rolling), but mine got a little too hard b/c the powdered sugar didn't fully stick.  I think I'll try to roll when it's ALMOST dry next time, but that didn't impact the taste, it was just powdery!  


Italian Christmas Cookies

Sunday, December 09, 2018 No comments
 Last week my school hosted a cookie exchange.  I've been putting this together for at least ten years now.  I'll share more about it in a few days, but in the meantime, this is the cookie recipe I brought this year.  I'll put a link below the full printable.  I always try out something new (which is our whole goal).  These were a new route for me, they were more of a sandy cookie, not as sweet as some, with a little hint of almond and lemon.  I liked the fact that you can sprinkle them any color you want.  I found instead of dipping my cookies, I spooned icing on top.  I also just used real butter instead of butter flavored crisco because it's what I had on hand. 

Here is a link to a free printable. 
We always share the recipe, which is great b/c you can keep the ones that meet your tasting standards likes and dislikes, and you can toss the others. 

Christmas in July-Last Year's Cookie Exchange

Thursday, July 24, 2014 1 comment
 Speaking of cookie exchanges.  We were on that topic, right?  Look, I always take all these pictures in December, but since I blog in advance most of my post-my blog is usually super full, so I have to put it off until the next year, but then....my blog is full again, so I dlecide to divide some of these things out....and since most of the craft stores probably have started clearing some aisles for Christmas....why not throw on a few ideas here as well.  The last 5 years or so we've done a cookie exchange at work.  We do a little different twist because there are a lot of ladies that love to bake and would like to share some cookies-or rather the recipes, so our take on the traditional cookie exchange is more of a recipe exchange.  Whoever wants to participate signs up in advance (we usually have anywhere from 17-25 participants depending on the year.  Once I have a count I send it out and each person is responsible for bring a bag of two cookies for each person with the recipe attached.  It gives us all a chance to try out new recipes, but we usually just have to bake a double batch of cookies.  I always get some great recipes to add to my collection, and I don't have to try baking them all myself-and get to try some of my pins without the work!
We lay them all out on the counter, then each person goes around with a basket or a bag and takes one of each other person's cookies. There were a ton of great recipes I'll share.  Some decorate their bags, other just do the ziplock thing=I'm fine with either-it's what's inside that counts, right?  ;o)
Here are two of the recipes I loved...
Elf Treats-they reminded me a peanut butter/chocolate rice crispie treat-a marriage of some of my favorite things!
 Elf Treat Cookies
by Laine and Stacey
Ingredients:  1 c. sugar, 1 1/3 c. creamy peanut butter, 4 1/4 c. rice crispie treats, 1 c. corn syrup, 1 pinch of salt, 3/4 c. chocolate chips, 6 chopped Reese's peanut butter cup
Instructions:In a large saucepan melt sugar, corn syrup, and peanut butter over medium heat until smooth. Remove from heat.  Quickly add the salt and cereal and stir to combine.  Add the chocolate chips and stire again.  Wait 1 minute and then add Reese's and fold mix together.  Line baking sheet with parchment paper and press down.  Cut into bars when cooled.
...and a second one....
I also loved these chocolate ones-they are my perfect combo of sweet and salty!
Salted Chewy Chocolate Cookies
 by Claire
Ingredients: 1 1/4 cup butter, 2 cup sugar, 2 eggs, 2 tsp vanilla, 2 cup flour, 3/4 cup cocoa, 1 tsp baking soda, 1 tsp salt, Kosher salt to top
Instructions:  Preheat over 350 degrees.  In a bowl cream together the butter and sugar then add the eggs and vanilla.  Sift flour, cocoa, baking soda, and salt into mix and beat until blended.  Drop by tablespoon onto an ungreased cookie sheet.  Sprinkle a dash of Kosher salt on top of the dough.  Bake for 8 minutes.  Cool on a cookie sheet for one minute.  Cool on rack.  
 

Cookie Exchange Kit

Friday, November 22, 2013 1 comment
 I decided last year that this year I was going to have friends over for a cookie decorating/exchange party.  I do this on a large scale at work, but I wanted to do this on  a small scale.  I'll post  more about it after the fact, but these are the 'kits' I've put together for each guest.  I wanted to keep it small b/c my kitchen is a galley, and there is only so much baking I can do.  I found the cookie tins at Hobby Lobby and went from there.  I put all the goodies in the tin, and I'll be adding a cute ribbon and this will second as my pals' Christmas gifts as well.
For the innards...
I made these aprons over the summer.  I wanted them to match the tins.  I went back and fourth with monogramming, but since I wasn't sure who all might enjoy coming....I decided to keep it more basic.  Here is the tutorial for putting these aprons together.  
 I found these cookie cutters (also at Hobby Lobby)...
 I also bought these little spatulas for smoothing icing (found them online, but have since seen these at super centers).
 I printed off free recipe cards, made these little clips, but I also attached recipe cards I made with the sugar cookie/icing recipe I used for the exchange.
 I found these tea towels at Sure la Table.  They have recipes for gingerbread.  I was going to make pot holders, but....found and fell in love with these instead.
 Everything fit snuggling into the tins that will double as a way to carry home the cookies we exchange/decorate.

Christmas Aprons

Friday, September 06, 2013 2 comments
 This past summer, one of my projects was to make some Christmas aprons.  I'm planning on having a cookie exchange this year, and I have a box of goodies as my 'gift' for each participant.  I don't know exactly who all I'm inviting, but I can tell you it is five people....because there are five aprons.  I have some ideas, but....more to come on that later.
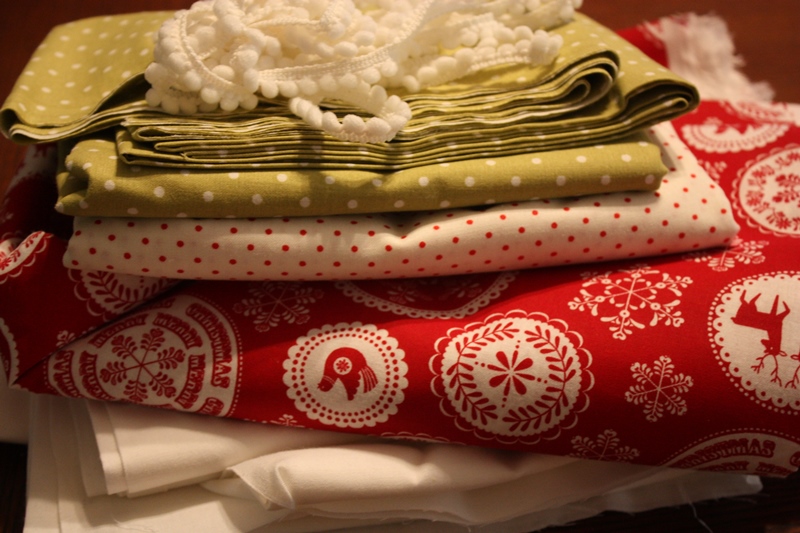
I went back and forth on how I wanted to do these up, and finally decided on this little get up after seeing some other aprons in this design.  The apron was easy to put together, but doing it five times was a little tedious.  I got four different fabrics, (plus some additional fabrics for the flower that I blogged the tutorial for yesterday.
 I cut out a solid white piece.  I cut a rectangle (15 by 24 inches) and I sewed three of the sides (I left one long side raw since I put the waist tie over that).
 I then cut the 3 different fabrics the width of the fabric (42 inches) by 5 1/2 inches  I sewed a small hem down all four sides.  I did add some ric rac to the bottom.  For the waist I cut out a pieces double the width (84 inches) by 5 inches.  I also hemmed all four sides.
 I pinned the bottom ruffle about an inch from the bottom.  I pinned it on both sides and in the middle so it was 'even' and then I just 'ruffled' the middle by pinching it randomly by hand.
 See...pinch (I know this isn't the 'correct' way to do a ruffle, but it's so much faster!).
 First layer is ready....
 The second layer I pinned a little bit more so I made sure I kept a straight line (it was easier to do the bottom since I just made sure to stay about an inch from the bottom as a I sewed).
 I did this one more time, and then I folded my waist piece in half and over the top of the raw edge.  I ruffled it (the white fabric) a bit as well so it wasn't a straight light (about 20 inches across).  I sewed it over the raw edge, and then I sewed both of the ties hanging loose together.  (Instead of creating one long sock and pulling it right side out).  It required the extra seam, but just seemed much easier to me.
I pinned my fabric flower to once side to complete the look.
 I have another apron like this made from bohemian type fabrics I love, but this little project matches the rest of my 'supplies' for my cookie exchange gifts. More to come on that later.