Category: Painting
Showing posts with label Painting. Show all posts

Christmas in July: Baby Jesus Shutter

Monday, July 22, 2013 No comments
I always have so many Christmas post in December/November....I have to set them to post for the next year....this year when I started on a few projects in -cough- April -cough-....I decided to go on the Hallmark schedule and post a few of those projects in July...right after I go and pick this year's ornament from the collection.  ;o)  I found some old shutters at a garage sale a few years back, and I've saved them for just the right project.  The shutters were free.  I bought some really thin wood and had my friend Terry cut out a little oval to make baby Jesus...
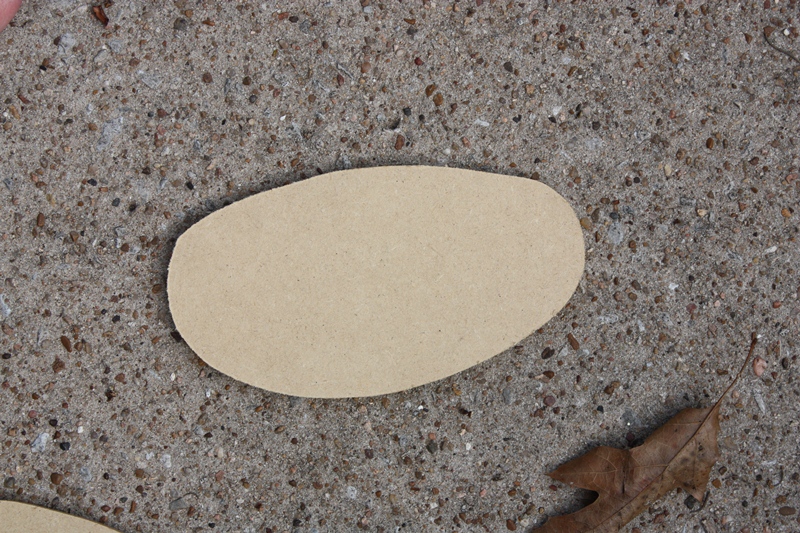
I painted his face flesh colored, and then I did my favorite painting technique (my friend Terry taught me about this, and it really does make the wood projects look better for some reason).  Basically, take an old (duh) tooth brush and white or black (or both) colored paint.  
 Put a little bit on the brush (not too much or it will drip)-you want it to 'flick'...you can practice on paper first but basically you just take the paint covered ends of the toothbrush and run your thumb down it to make it 'flick' paint.  I repeated this on the shutter after I sprayed it navy to make it look like a 'starry' night.
 I added eyes with the end of of a brush, and I took some strips of fabric I ripped so they looked ragged.  I wrapped it around the body of my baby and glued it into place to look like swaddling clothes.....
I decided to add one of these little wooden buttons for a nose.  I glued it down with wood glue.  That'll teach my brother to leave his woodworking stuff at my house.  

I added some Spanish Moss to the back with hot glue as well for the bed of hay.  
 Here is is....little Baby Jesus, away in a manger.
I also added a star.  I bought this in the unfinished wood section at JoAnne (If you can't find your jig saw and you don't have a friend who will cut out your shapes for you-you can also find all sorts of shapes and be creative about making your own baby.  I saw these ovals at Michael's.)
 I wrote the saying with permanent marker after two attempts with painting the words.  I nailed it to the shutter and added rope to the back to hang it up.


Paint-By-Numbers....With Friends

Tuesday, August 28, 2012 3 comments
I was recently clearing pictures off of my phone, and I completely forgot to blog about this little get together, and it really was a blog worthy night.  Somehow my job at work over the last few years has morphed into helping with the social events.  At the end of the school year, at the suggestion of some of the gals who have done this before, some of us decided to go to one of the local painting places.  These have been popping up all over Dallas, and I suspect further.  They have different names, I have no preference, we just chose one close to work.  Gnosh, Letsartparty, Painting with a Twist.  Each month they come out with a calendar of paintings you can choose between.  You choose a painting, and essentially the night they are going to 'create' that painting (if you have a big enough party you aren't tied to the art schedule, you can book the place for free.  Some of my friends have been taking their kiddos, and themselves to birthday parties under this painting umbrella).  We chose a pretty basic design (we voted, very democratic, I know....I used to teach Social Studies).  You show up and the place provides everything, the canvas, the paint...more paint if you are a fan of globs.  I am.  The apron, the brushes, and the instructor.  You can bring your own drink, and your own food. 
The 'class' lasted two hours with a break in the middle.  The instructor was really nice, and he took us step by step by easy step to create our art work.  There was a table (really, a room) full of people with all sorts of varying art skills, most of us don't paint, so.....it was great.  You can choose different colors, and a few ladies, not in our group, branched out, but even with us all following the same steps (they instructor and another lady also walked around and helped), they are all a little different, but all something we are hanging in our rooms/homes/garages.  Everyone really did have a good time.  It makes me nervous to plan new outings not knowing how they will go, and I think we were all in agreement this was definitely something we'd do again.  So....if you have a group, a birthday, friends, need to make friends, blank space on your wall.....I'm a fan of these painting places.  Just sayin'.

Watermelon 5 Cents Screen Door Hanging

Friday, July 29, 2011 2 comments
 ...and speaking of screens.  I made this one for my summer door.  I saw this original painting design on Gainer's Crafts.  I love this idea b/c watermelon just screams summer to me.  I used a piece of screen, and placed it on top of a trashbag to paint.  This made the paint pool and when it dried it stayed better on the screen. 
I'm now out of screen and frames this size, so I guess it's on to a new crafting venue.  

50 Cent Screen Snowmen

Thursday, July 28, 2011 4 comments
This is very much a work in progress, but I've added screens to my list of things to play around with this year...except, I wanted to find a cheaper form of doing this other than finding old screen doors and windows....I wish they were readily available, but they aren't.  I have no doubt this has been done before, and much better, but here's my version of screen painting.  I found an empty frame at a garage sale, and a piece of screen left over from my friend Terry's, sister, remodeling job.  I'm sure you can purchase this at stores like Home Depot.  I also found a picture of a simple snowman in Terry's pile of projects I wanted to try out. 
 I painting my snowman.  I tried to make the paint thick, but it still seeped throughthe box.  Penmenship is my next issue, but I have a long way to go!  I can handle that, I have a long life ahead of me. 
 It took a lot of paint to get the screen completely covered.  I tried this a second time and found placing the screen on a trashbag took less paint and helped keep the coating thick. 
 Even though I made the paint thick, it still stayed on the box, and only the screen ended up being painting. 
 I added a wire to the back, and gave the frame a light spray of paint.  I just used supplies I had at home, so for 50 cents....new series of projects have been launched. 

Shadow Silhouette Splatter Painting

Saturday, April 09, 2011 3 comments
I had this little idea last Christmas when I made this Abbey Road/Beatles splatter painting (source attached to the original link).  I've been in love with silhouette for a long time now, but I have no little kids, and I didn't have any side profiles of my friend's kiddos-my favorite source of craft experiments, until Kristine shared this precious photo of her daughter taken from the side. 
 I printed it off, cut out Kate's silhouette, painting the canvas, and then used adhesive spray to place the photo in one corner. 
 I used a second color, and I painted and splattered. 
I let it dry, and then the photo pealed away without any mess.  I think it's a fun alternative to all the other great shadow works of art out there, and it would be really cute in a variety of colors for a Mom. 

Linking To:  Be Different...Act Normal

