Category: Recycle
Showing posts with label Recycle. Show all posts
Do you want to build a Snowman?
Friday, March 27, 2020
No comments

Normally I'd post this guy in December, but....I'm home. I'm crafting up a storm. I decided March seems like a goodtime for a snowman craft. A lot of times I don't post things like this without a tutorial, but I'm proud of this guy. Not because he's so amazing, but because he's the chair leg of a chair I bought at an online auction. I went and picked it up and it turned out it was a piece of junk. It was rickety and someone had replaced the seat with plywood and painted it to match the elegant chair. I waited a year thinking I'd replace that seat. One day I bumped it in the garage and it fell and the back fell off. So, I took that puppy apart and tossed most of it. I'm going to paint a second snowman with fancy spindle #2 and I have a back piece I think is going to be angel wings. So, not a bad deal after all! And....lesson learned with the online deal!

Repurposed Container Garden
Monday, May 07, 2018
No comments
I'm doing all the 'easy' things first on my list of 40 before 40. A(nother) garden is on my list. The truth is, I've planted....and killed, many fruits, veggies, and herbs through the years, but this year I wanted to plant something I was proud of that fit 'me.' I can successfully grow jalapenos....this year I put two of those in the mix b/c I knew they wouldn't fail me. This was one thing on my list-really GO FOR a garden again, and I went back and forth about creating a box and filling it up in the traditional way. I may go back there again, but this year I tried this out. I had all of these things, except for the baby bath, lying around my yard or house. The baby bath is vintage from Hungary. I bought it off of William Sonoma when they had a sale going on...after I saw one at my friend Kelly's house. Each piece is upcycled in some way....an old stand with the tabletop missing, an old galvanized pale I had my brother drill holes in, an old coke grate I'm hoping cucumbers will love hanging out in....
Next up I'm going to make a planting station out of an old door.
In the meantime, I commit to not overwatering. Not forgetting it's out there, and doing a little research when the plants protest their new homes.

Valentine's Box (Recycled Laughing Cow Cheese Box)
Friday, February 10, 2017
No comments
I was recently charged with making some project for something called Art Abandonment. It's a facebook group that makes art and 'abandons' it with a note for people around their city. Add to that I wanted to use products from a store in Denton called Scrap that is filled with things people donate. Artist run the shop/and buy the supplies for their art work. I love to go there and get inspired....this go 'round....I was inspired by these Laughing Cow Cheese Boxes.
I also picked up some lace, yarn (I crocheted into a heart shape), vintage Valentine's Cards, and a bottle of sequins.
I used some scrap papers to cover the box.
I covered the sides with ribbon. I filled this box with chocolate because it's for someone I know, but I'll 'abandon one' with some little sheets inside to make a scrapbook b/c I figure strangers won't want to eat my chocolate. The top was decorated with little scraps I picked up at the store. This isn't an add, just a fun find (in stores), and fun project.

DIY Pegboard
Wednesday, October 12, 2016
No comments
I'm turning my guest room into a craft room. All the guest I would have know I craft, so....it's time. I've been doing a few projects over time and I'm just about to get started. Paint and floors need to happen first, but then the magic happens. I made a cork board I'll post about soon, but I knew I wanted a peg board. I thought I might get a large frame a thrift store, but even at thrift stores they were more than 20 dollars. BUT one evening I took my dog for a walk and someone had a huge frame out by the dumpster....
I took it home and ripped out the glass/pictures/back so that only the frame was left.
I grabbed a can of paint and gave it a good coating.
Last I grabbed a pegboard from Home Depot and I used the inside picture to cut it down to size. I also added to pieces of wood to the back of the frame so it sticks out a bit from the wall and I can put pegs on it.
So....for less than 7 bucks I have a 3x4 foot pegboard. Dumpster diving is my new favorite activity.
I took it home and ripped out the glass/pictures/back so that only the frame was left.
I grabbed a can of paint and gave it a good coating.
Last I grabbed a pegboard from Home Depot and I used the inside picture to cut it down to size. I also added to pieces of wood to the back of the frame so it sticks out a bit from the wall and I can put pegs on it.
So....for less than 7 bucks I have a 3x4 foot pegboard. Dumpster diving is my new favorite activity.

Snowman Fan Blade
Friday, November 27, 2015
No comments
I replaced a fan in my house last spring. I kept the blades to transform into some crafts. This is the 3rd of those six blades, though the rest are coming....
My friend Terry gave me some painting lessons to make this grungy guy. I'll give a step by step soon, but....seriously...fan blades, how fun...and they already have the holes for hanging! I'm thinking I need to replace ALL the fans in my house!

Pumpkin Fan Blade
Thursday, October 22, 2015
No comments
I have a friend (Terry) who literally will paint on anything. I went to one of her shows recently and she had painted a snowman face on old toilet bowl ball (you know that thing that floats up with the water to trigger the 'stop' on the water?). I digress, but....she's another story. ;o) Anyway, fan blades are one of the things I've seen her use for her Santa's and Elves. This summer I asked her for a painting tutorial and I decided to try my hand at something fall....something simple on some fan blades I'd recently yanked off a fan I replaced in my house.
I've seen these for sale at thrift stores before and I probably would have wondered about the kind of person that would buy these but now I've met her! I did not use the spray can of white to give this a primer (that comes with another project). I just used some Americana paint called Paprika. I gave my blade two coats. When that dried I painted a face. I went back and added some white lines to make it pop, and then I took a tooth brush and flicked a bunch of white and black paint all over the blade. I added some wire and raffia. Simple, fun...and definitely different.

Canning Lid Pumpkin
Tuesday, October 06, 2015
No comments
I made this little pumpkin at the request of one of the GMT producers. She saw one of these last year at a craft show and fell in love. I'll be sharing this and a few more pumpkin crafts on Thursday on the show, but in the meantime, here is a sneak peak.
I found some old canning lids for 69 cents at a thrift store. You may have some floating around, or you can also order them (or buy them a the store). I took about 16 and threaded them through a pipe cleaner. You could also use yard. I tied it with a little wiggle room so I could maneuver them. I sprayed them with orange spray paint. You can do this before or after you thread them. Just move them around a bit and get all the overlapping edges if you do it afterwards. I added a stick to the middle and tied a ribbon for the leaves. I might go back later and add some washi tape to every third or forth one just for fun ,but...easy and cute. I have plans for the flat seals as well....but...that's another blog post!

Spell Books
Tuesday, September 29, 2015
No comments
I have a stack of old books from a project I did last year. I've slowly, but surely, been crafting my way through the remainder of the box! I painted some of them black (with a can of 99 cent spray from Walmart) and then I took some black glitter paint and painted the edge of the pages. I tied them all together and then added some little phrases on the spines. You could hand write these, but I used a cricut b/c my hand writing has lots of room for improvement. I used some sparkle tulle to put them all together, and then added a little spider and bottle (I paint the end of the bottle green by dumping green paint inside and turning it upside down so all the sides were coated and the excess dripped out). Easy and quick-and now....I have a few less books that are taking up space in the box by my door where I left them almost a year ago.....oops!

Earth Day: No Sew Recycled T Shirt Grocery Bags
Wednesday, April 22, 2015
No comments
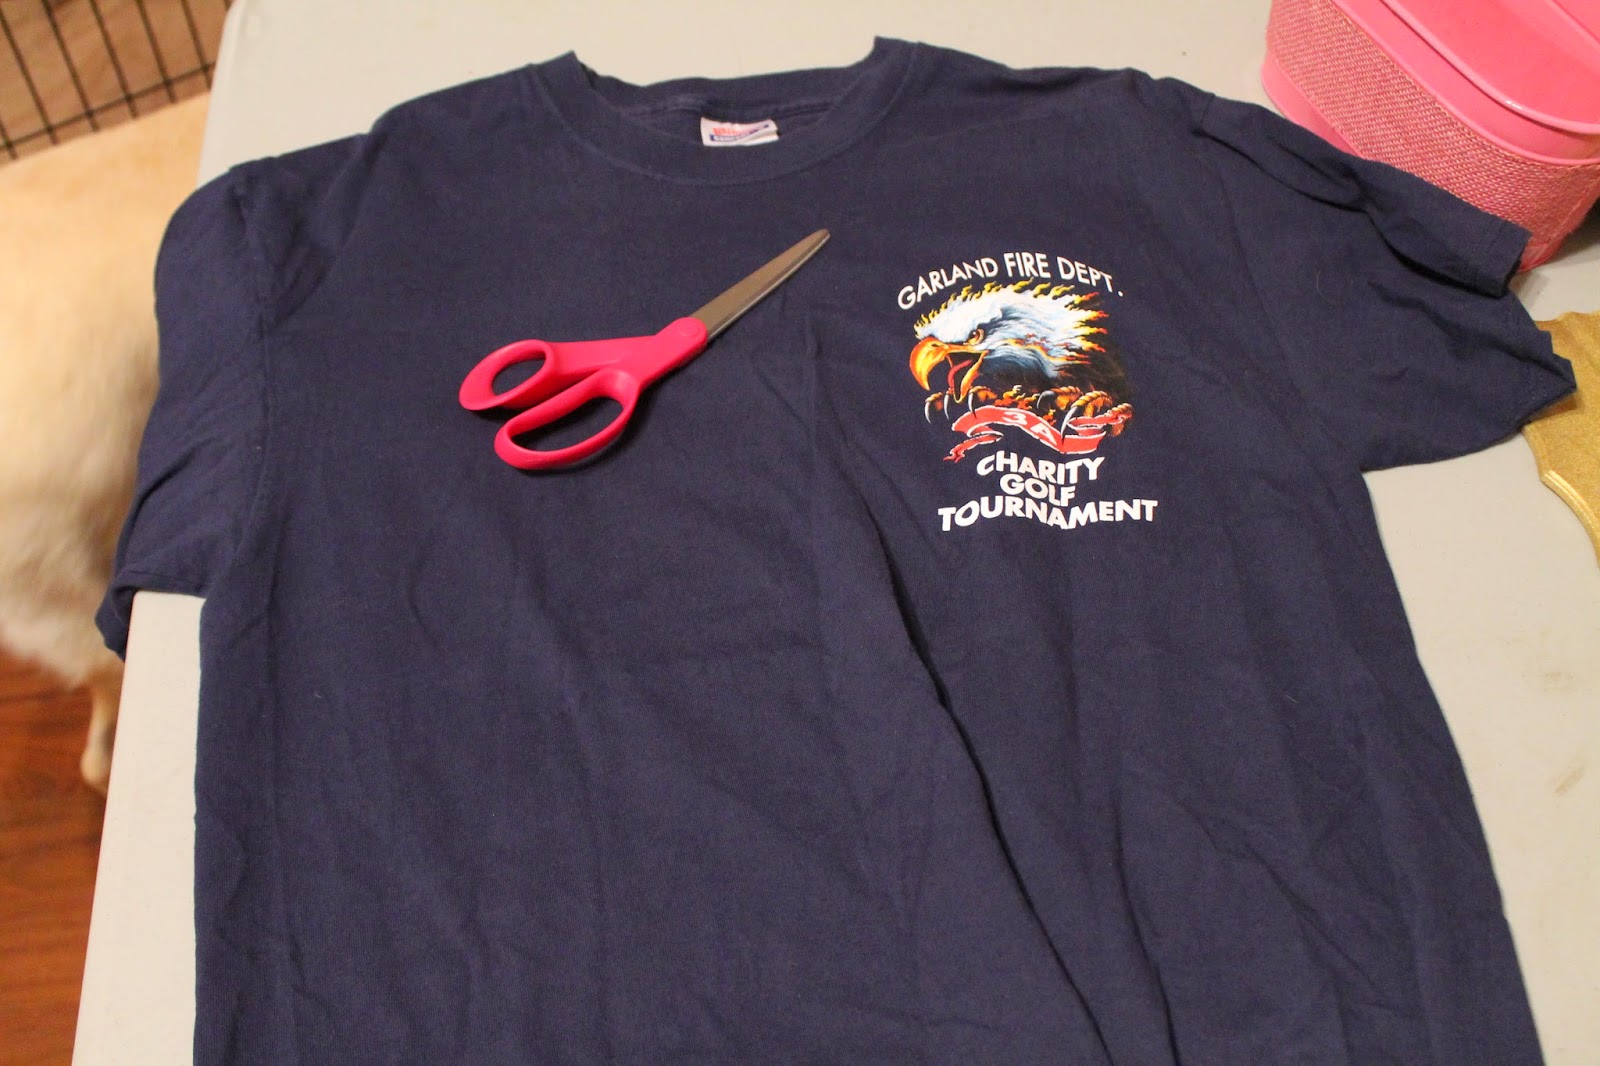
I was a little skeptical about how this tshirt bag would work without my sewing machine....but I'm all for letting that machine collect dust in the closet whenever possible, and guess what....this worked great! I saw the original idea for this on this mommyblog. If you have a closet full of old tshirts....and a city nearby (Dallas) who has started charging for bags at stores....here's a great idea for making your own. The perk to these is you can wash them.
All you need is an old tshirt and scissors.
Cut off the sleeves (right near the seam to the sleeve.
Figure out how big you want your bag to be and cut large fringe pieces (about an inch) up to where you want the bottom of the bag to be. Depending on the material, keep in mind, it's a shirt, so it will stretch a little.
Turn the shirt inside out.
Take the two pieces sitting side by side and tie them in a knot.
Do this to the next two pieces.
Now....take half of each of those and tie them together (so it creates a second layer of knots). This prevents there from being little holes between the ties because each tied piece is then tied to the one next to it.
Once you have done two layers of knots.....
Turn the shirt so the outside is showing again (the fringe will just rest at the bottom of your bag).
Now cut off the collar. The goal is it to look like half an oval. This is going to be your bag opening.
All you need is an old tshirt and scissors.
Cut off the sleeves (right near the seam to the sleeve.
Figure out how big you want your bag to be and cut large fringe pieces (about an inch) up to where you want the bottom of the bag to be. Depending on the material, keep in mind, it's a shirt, so it will stretch a little.
Turn the shirt inside out.
Take the two pieces sitting side by side and tie them in a knot.
Do this to the next two pieces.
Now....take half of each of those and tie them together (so it creates a second layer of knots). This prevents there from being little holes between the ties because each tied piece is then tied to the one next to it.
Once you have done two layers of knots.....
Turn the shirt so the outside is showing again (the fringe will just rest at the bottom of your bag).
Now cut off the collar. The goal is it to look like half an oval. This is going to be your bag opening.
You are ready to roll. I tied the two handles at the top just to give it a little more strength when carrying. This took me about 10 minutes tops.
And....you're welcome, earth.

Bird House Ideas
Wednesday, April 09, 2014
No comments
Today I'm bringing bird houses to Good Morning, Texas. They asked-I got to work. First up is the one above using a preformed bird house I attached wine corks too. A bird bar. Here is the full tutorial for that. I don't drink, I'm not a fan, but....I am fascinated by wine corks-I bought these on etsy.
I do love a good recycled project, in this case-I found a pink pan at the thrift store for a few bucks and put this little gal together. Here is that tutorial.
Last up, a true recycled project-I took a coke bottle and painted it. I just used acrylic paint on the outside (so none would chip off an affect any next that were built here). You could use the full bottled, but I cut mine down into two pieces. I sprayed it with some water resistant spray. I used and blade to cut out the hole. The size of your hole determines the size of your bird family. I also read to place brighter houses near gardens, and more natural colors if they are just in a tree so you don't advertise to the enemy (aka, the cat) where they can find a tasty snack. How high you hang your house also matters. Here's a link on about.com I found. The full step by step video should be posted on my facebook page later.
I do love a good recycled project, in this case-I found a pink pan at the thrift store for a few bucks and put this little gal together. Here is that tutorial.
Last up, a true recycled project-I took a coke bottle and painted it. I just used acrylic paint on the outside (so none would chip off an affect any next that were built here). You could use the full bottled, but I cut mine down into two pieces. I sprayed it with some water resistant spray. I used and blade to cut out the hole. The size of your hole determines the size of your bird family. I also read to place brighter houses near gardens, and more natural colors if they are just in a tree so you don't advertise to the enemy (aka, the cat) where they can find a tasty snack. How high you hang your house also matters. Here's a link on about.com I found. The full step by step video should be posted on my facebook page later.

Repurposed Pan = New Bird House
Monday, April 07, 2014
No comments
I saw the idea for using an old pot to make a bird house a few years ago and it stuck with me. I changed up some of the technique, but my inspiration lives at tatortot. My first step was to find an old pan. You can find one you want to paint, but I stumbled across this pink one. Score.
I also bought a thin sheet of wood, you could also use foam board, just clean out any test at the end of the nesting season when the family moves out and replace it. I figure if those foam boards work for election signs out in the season, they should work for this as well.
I used a jigsaw to cut out the circle I traced around the lid of the pot.
I drilled a hole in the middle.
I took the same saw and drilled a hole in the middle. The bigger the hole, the bigger the bird or animal that can fit inside, so...if you want cute little song birds, make 'em small.
You could use a foil pan, or I found this weird piece of metal in the plumbing section at Home Depot.
I cut a piece and nailed it down with thumbtacks to help protect the bird family from some rain.
I drilled a hole in both sides of the board and in the pan and I tied it on with ribbon. I added a dab of glue before hanging so it would hold firm until I was ready to clean it out and refresh the home.
Now.....time to advertise my vacancy!
I also bought a thin sheet of wood, you could also use foam board, just clean out any test at the end of the nesting season when the family moves out and replace it. I figure if those foam boards work for election signs out in the season, they should work for this as well.
I used a jigsaw to cut out the circle I traced around the lid of the pot.
I drilled a hole in the middle.
I took the same saw and drilled a hole in the middle. The bigger the hole, the bigger the bird or animal that can fit inside, so...if you want cute little song birds, make 'em small.
Now for decorating. I read up a bit on this: you want your house to blend in with it's surrounding so you aren't advertising to the enemy (cats) where their dessert lives. This little guy is going near a garden, so pink should be fine. You could paint your wood, use scrapbook paper, and lots of water resistant spray, but I found some duct tape that worked. I'll still probably replace it after a summer outside, but....it should hold pretty well in the weather.
I drilled another hole for my little perch. I found this knob for half off at Hobby Lobby. You could use a foil pan, or I found this weird piece of metal in the plumbing section at Home Depot.
I cut a piece and nailed it down with thumbtacks to help protect the bird family from some rain.
I drilled a hole in both sides of the board and in the pan and I tied it on with ribbon. I added a dab of glue before hanging so it would hold firm until I was ready to clean it out and refresh the home.
Now.....time to advertise my vacancy!

Subscribe to:
Posts (Atom)
© Christy Robbins · Design by Albemarle PR · Craft Clipart by Le Petite Market