Category: Gift Wrap
Showing posts with label Gift Wrap. Show all posts

Mini Unicorn Pinata

Friday, July 22, 2016 No comments
 I made my own mini donkey pinata a few years ago to fill with a gift card to a local Mexican restaurant.  Here are those instructions.  Recently I saw a unicorn pinata online, and it was my intention to make another pinata....the unicorn version, but then I ran across some mini donkey shapes already put together at Hobby Lobby.
 I used a coupon and picked up a three pack.  They also sold the fringe (this is not an ad-seriously, I just hate trying to search down products), but I just bought some tissue at the dollar store.
 I cut the tissue into strips.
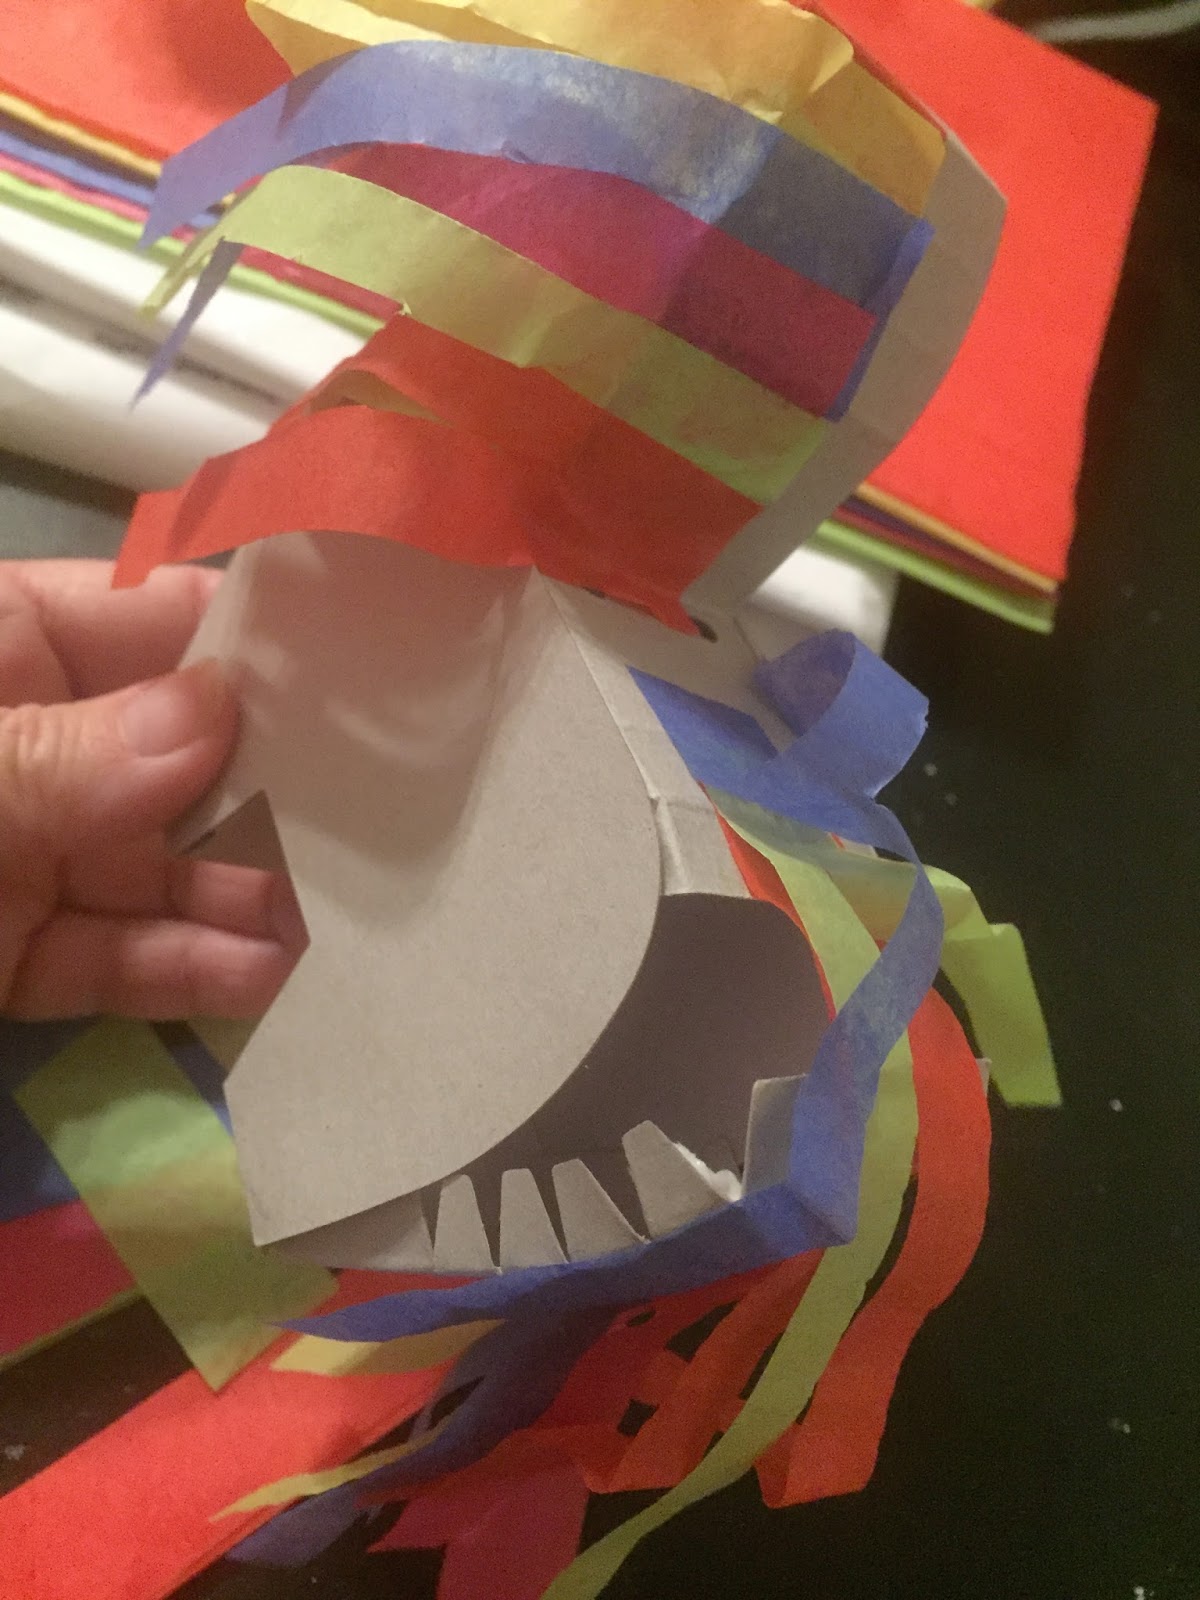
 I glued strips down the main, overlapping them a little bit.
 I just used regular old glue stick.
 I did the same thing with the tail, but instead of having it go to the side like the main, I had it go towards the back.
 Here's a look at the finished main.  It doesn't have to be perfect b/c you are going to go over it with the white.
 The tail is also where the opening was.
I slipped the gift inside.  
I then took white tissue and I covered the body with fringe.
I took a gold piece of scrapbook paper and glued it into the shape of a cone.
I glued a little strip in the cone, and used that surface to glue it onto the head of the unicorn.
I have two more of these guys....I think I'm going pastel with the next one, and then....who knows, the sky is the limit.

Coal Gift Bags

Friday, September 11, 2015 No comments
 I thought I was so ahead of things this summer as I was making Christmas gifts...until I read one of my other friends said she was WRAPPING Christmas gifts!  OK....so...I'm not ready to wrap them, but....I did decide to make some easy gift bags with some left over white bags I had from another craft.
 I typed the word coal and printed it on a piece of cardstock.
 I taped the bag onto the paper and positioned it where I wanted it to go.  I taped the top where it would start running through the printer and then both sides right by where it was going to print (to help stabilize it and keep the ink from smearing).
I carefully lifted off the tape and now....I'm ready to wrap.  OK...not really, but I could be.  And clearly, I have a bunch of naughty people getting gifts this year.

Newspaper Gift Wrap

Wednesday, December 18, 2013 No comments
Here's an easy, last minute gift wrap idea...if paper is running low.  My paper wasn't running low, I really just wanted to try this out b/c I like the look.  I folded over newspaper and ran each side through my sewing machine with red thread.  I slipped the gifts inside and added red bakers twine....I could write odes to baker's twine....but I won't....now.  Add a tag, and I'm kind of digging the look! 

Halloween Candy Gift Wrap

Tuesday, October 01, 2013 No comments
I saw the idea for making these little candy wrappers at jonesdesign.  I had this little shirt for my goddaughter that I made last year.  Here is the link to the shirt how to blah blah blah. 
 I rolled it up, then rolled some tissue around and it used stickers to spell out her name. 
 I wrapped a little piece of cellophane around the whole thing and tied it off.  And now...it's off to celebrate the season with one of my favorite pumpkins. 

Fabric Flower

Thursday, September 05, 2013 No comments
 I made these flowers for an apron I'll share soon.  The colors go with the apron/Christmas.  I was inspired by a bag and my plan is to make some of those bags next, but first....
I grabbed three different colors of fabric and felt...and pins if you want these to be removable.  For the button middles you could use buttons, or I bought these little metal things at the craft store and followed the directions on the back of the box.
 For the petals I cut out two different sized circles.  Here is a really professional free template of those two size circles (oh, if only there was a sarcasm font).  I cut out four of each size and then a little round circle from the felt.
 I folded each circle into fourths and then sewed all the points to the felt.
 I staggered the middle to overlap the middles and then sewed on the button.
 I wanted the gals I made the aprons for to be able to remove the flower for washing, so I added a pin.  I used a little rectangle of of felt and one of these flat pins (from the craft store).  I hot glued it down.
 Like this...
 I made five of these to adorn five aprons....
 ...but I did it b/c I bought this cute little bag.  It had a little flower like this on the side, and then a double ruffle down the side edge.  The edges of the fabric were left raw.  I want to make some of these for gift bags this year.
 Here's a close up.  The bags are just the canvas bags you can buy in three packs for about 5 dollars.  This lady cut a little wedge in the middle of each flower.  I've been using my bag to carry small craft projects to my friend's out this summer.  It's always good to craft in style.

Sheet Music Packaging

Tuesday, April 09, 2013 No comments
I saw this idea for wrapping gifts with sheet music at PaigeSmith and I had just the book to wrap up like this....along with some broaches I picked up at antique stores and thrift stores.  As for the music sheets-I googled free sheet music and just printed it on off white/antiquish paper.  Affordably fun. 

Cookies: Sugar Cookie Gift Tags

Thursday, December 13, 2012 1 comment
Edible gift tags?  Christmas is even better this year at my house.   I added this idea for tea bag cookies from frostme, and made 'gift tag' cookies this year.  I'll be added names to these little guys to top off gifts this season.
I used this recipe to make the sugar cookies.  I love it because the cookies hold their shape.  I just 'freehanded' the shape with a knife after rolling it out to a little more than 1/4 inch thick.  As soon as the cookies were out of the oven I used a straw to punch out a hole at the top for the string.  I dipped the edge into chocolate.  I might make some with icing and names, but really....does anyone protested a chocolate dipped anything?

Chalk: Chalkboard Gift Tags

Monday, August 01, 2011 2 comments
The great thing about a gift tag made with chalkboard paint....if you get made at the recipient, you can just erase the name and scribble on a new recipient.  I'm thinking my Mom should be safe this holiday season, but...you never know.  I've seen these around in all shapes and forms, so this is my version.  I've also seen a lot of chalkboard scrapbook paper coming out on the net.  Spray some tag board and you can do the same thing....for a lot less than it's selling for right now.  The sell tagged shaped wooden pieces, but I just bought a pack with rectangular pieces, and sawed and sanded down a tag shape (I've been trying to search for a purpose for that silly saw I didn't end up needing for an emergencies that involved winter, a pipe, and the entire wall of my bathroom that needed to replaced after the problem was 'fixed'). 
These wooden chips had small holes, but I used a nail to create a larger one for my ribbon.  I used these wooden chips a few years ago for Blythe's family picture match game cards.  I have a feeling there are some burlap or brown craft paper wrapped gifts with these tags attached in my near future. 

Vintage Sewing Pattern Tags

Monday, July 11, 2011 12 comments
 Yeseterday I shared some supply pockets I made with old patterns.  I used the pockets and the instruction sheets, but I was left with the actual patterns.  I went on the etsy hunt for some ideas for using up these scraps and I came across this idea for making package tags with old pattern sheets.  I cut out the size and shape I wanted for the tags using white tag board. 
 I glued down a section of the pattern on both sides of the tags I had created.
I trimmed it down, and added a hanging hole, and these little white circle things to reinforce paper holes when they tear  that are literally left over from when I was in high school...in 1997.  No lie.  Did anyone else use those as religiously as I did?  I carried them in my pocket protector...or was that my Trapper Keeper.  Now THAT is vintage.